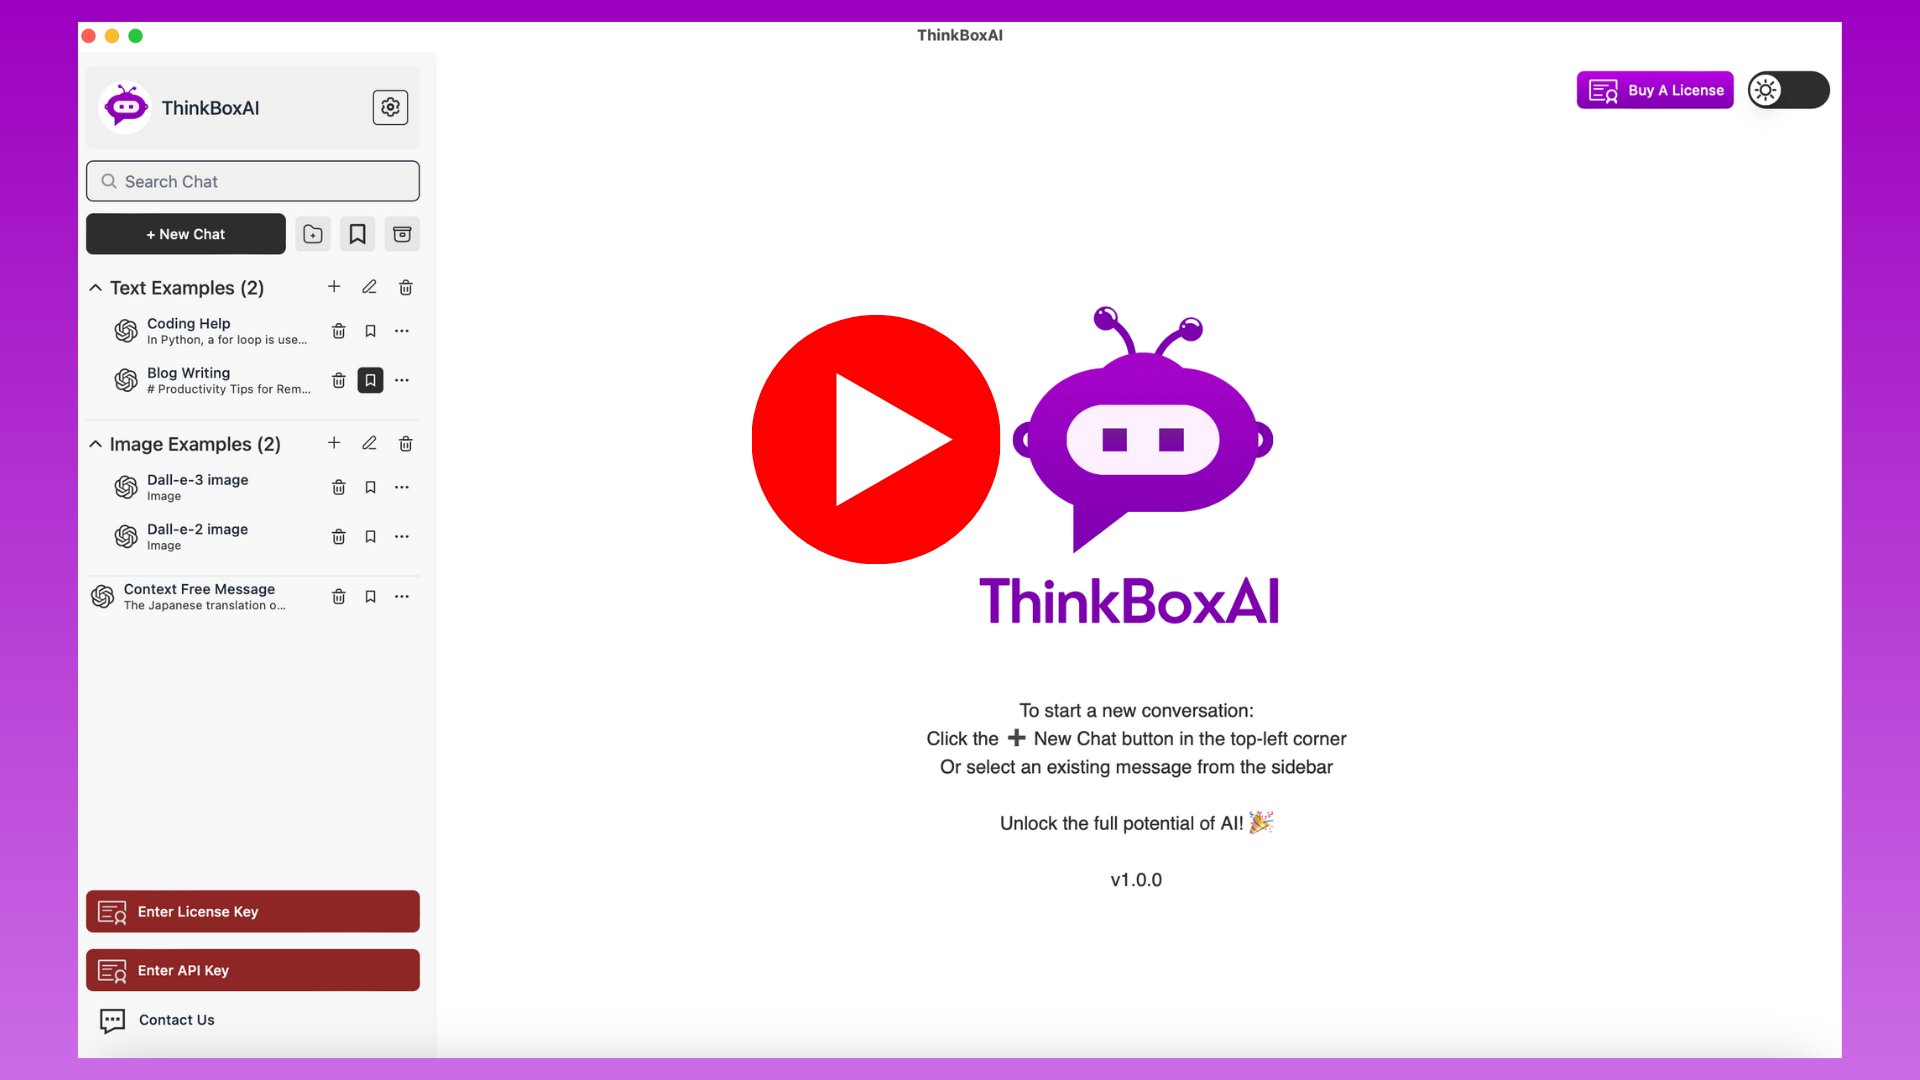
How to use the ThinkBoxAI Desktop application ?
Just got ThinkBoxAI and are you wondering how to make the most of it? This step-by-step guide will walk you through setup, features, and tips to maximize your AI experience. Get started effortlessly and boost your productivity! Read the full guide.
Short Video For Important Features:
Detailed Video Explanation:
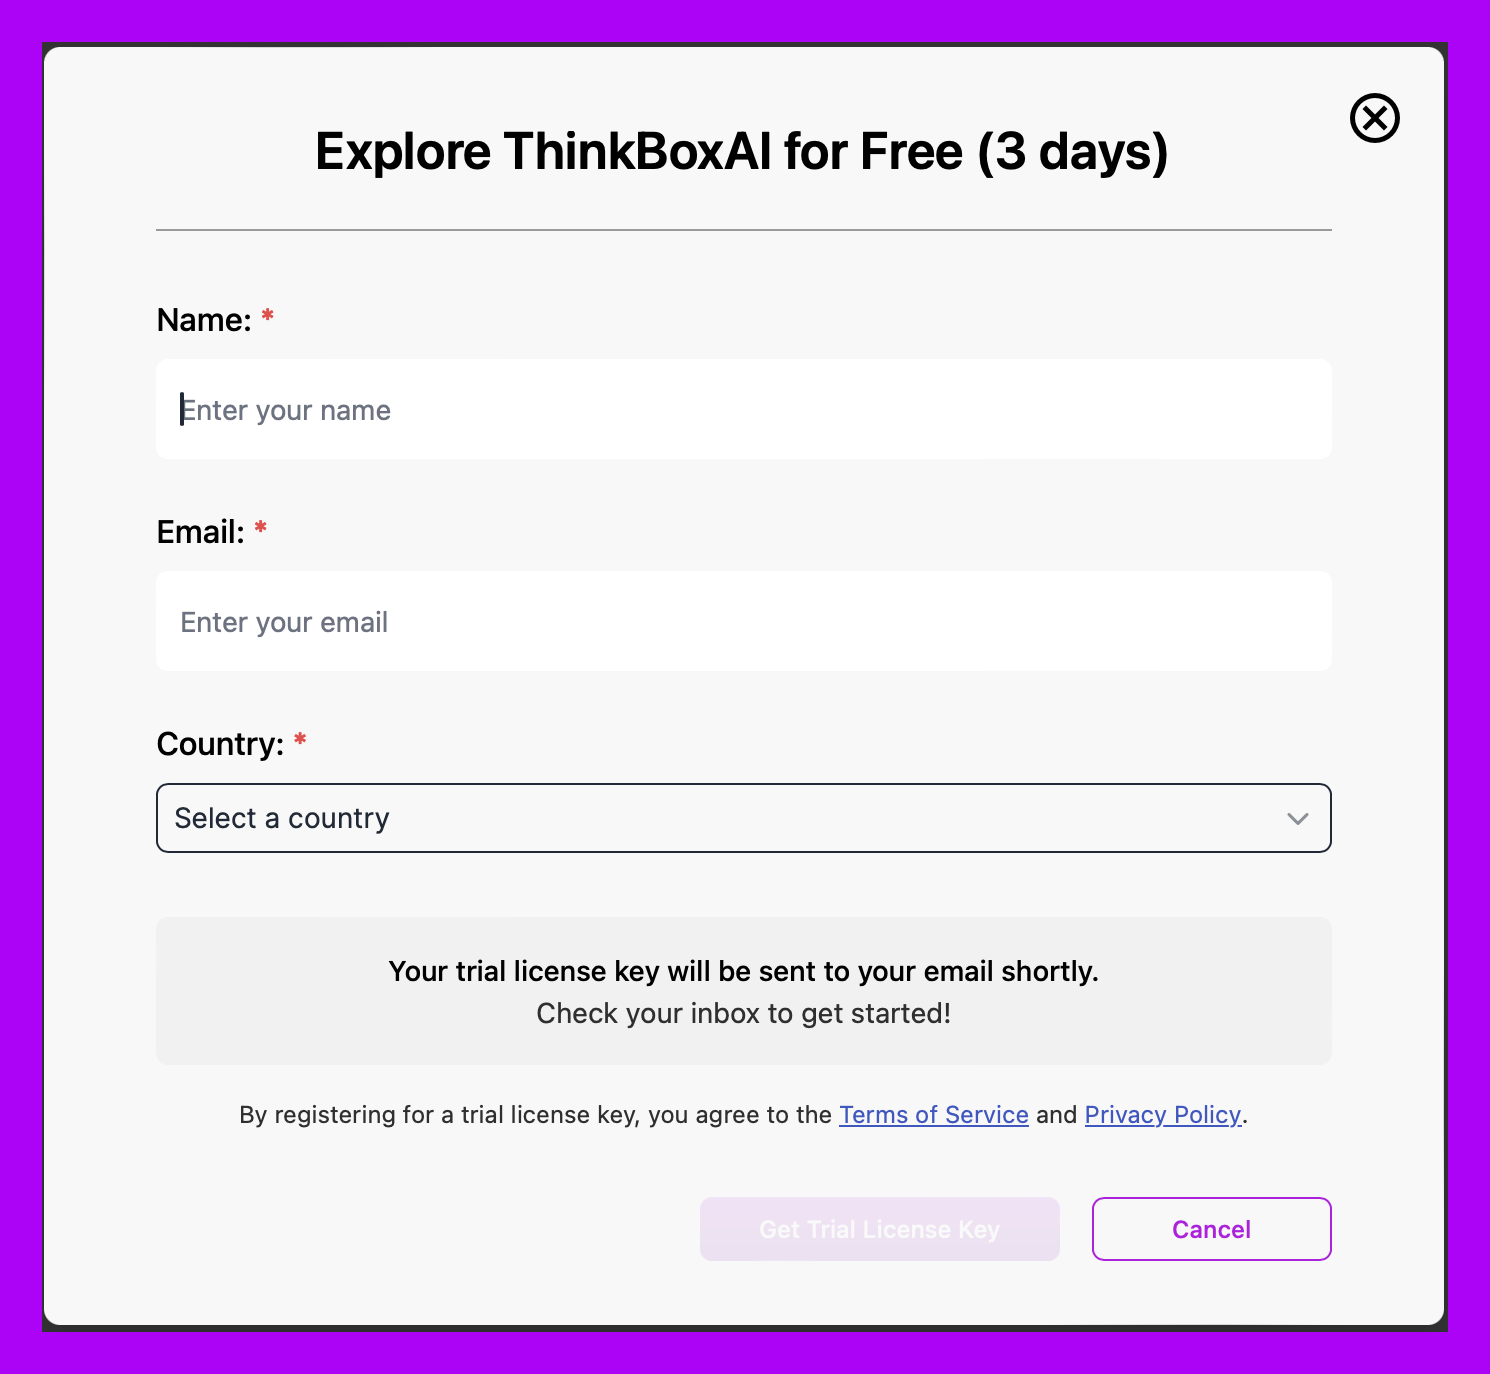
1. Registering ThinkBoxAI License Key
Purchase ThinkBoxAI license key from our website www.thinkboxai.com
You will receive a license key in your email. Enter the license key and email address in the application.
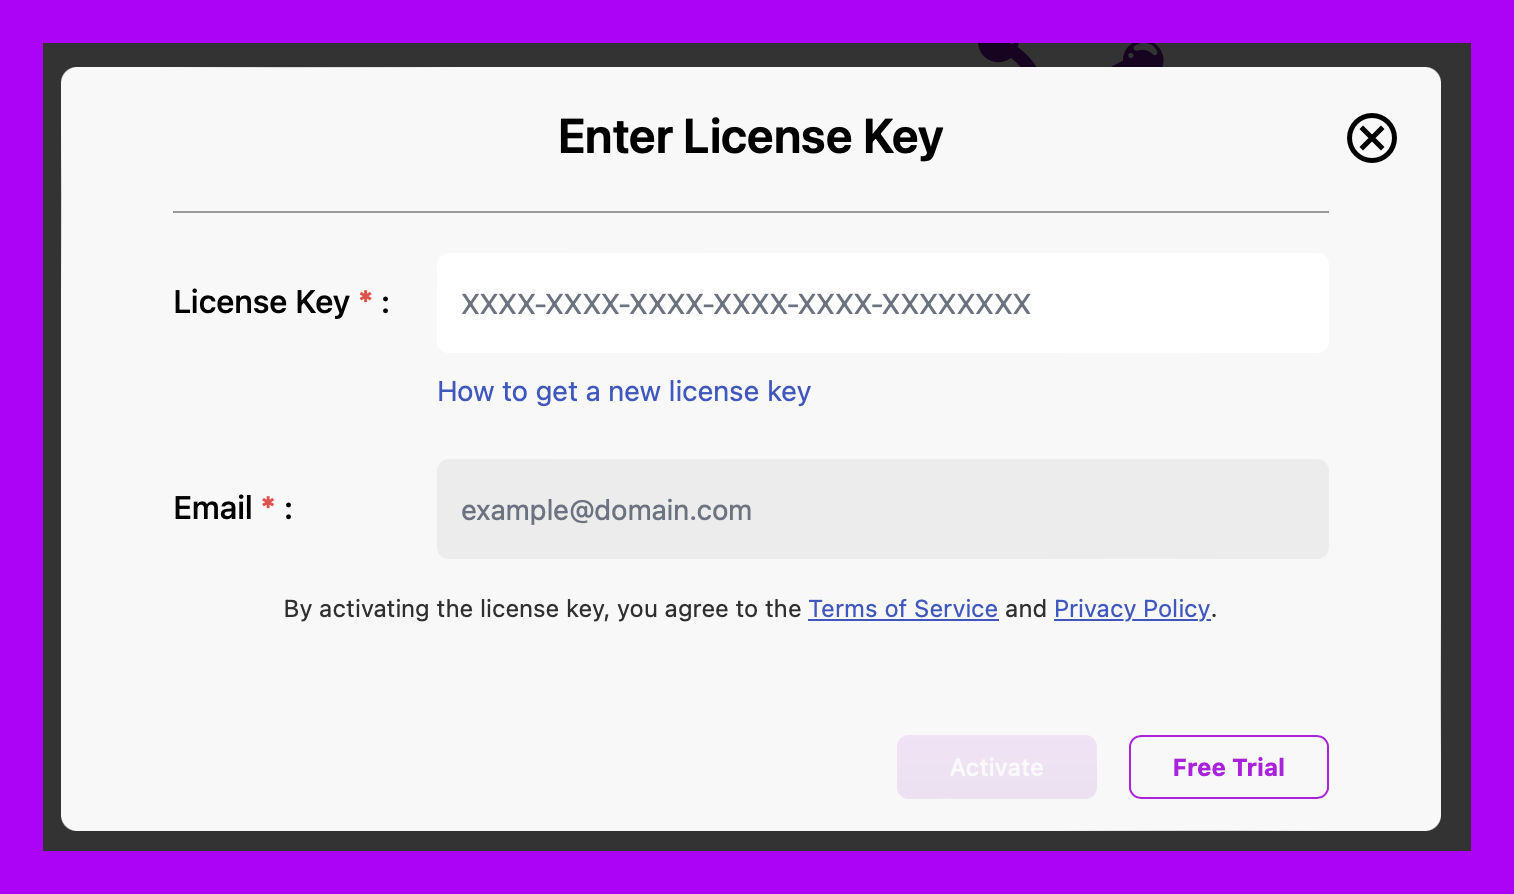
If you are new user and want to try the application, you can use the trial license key.
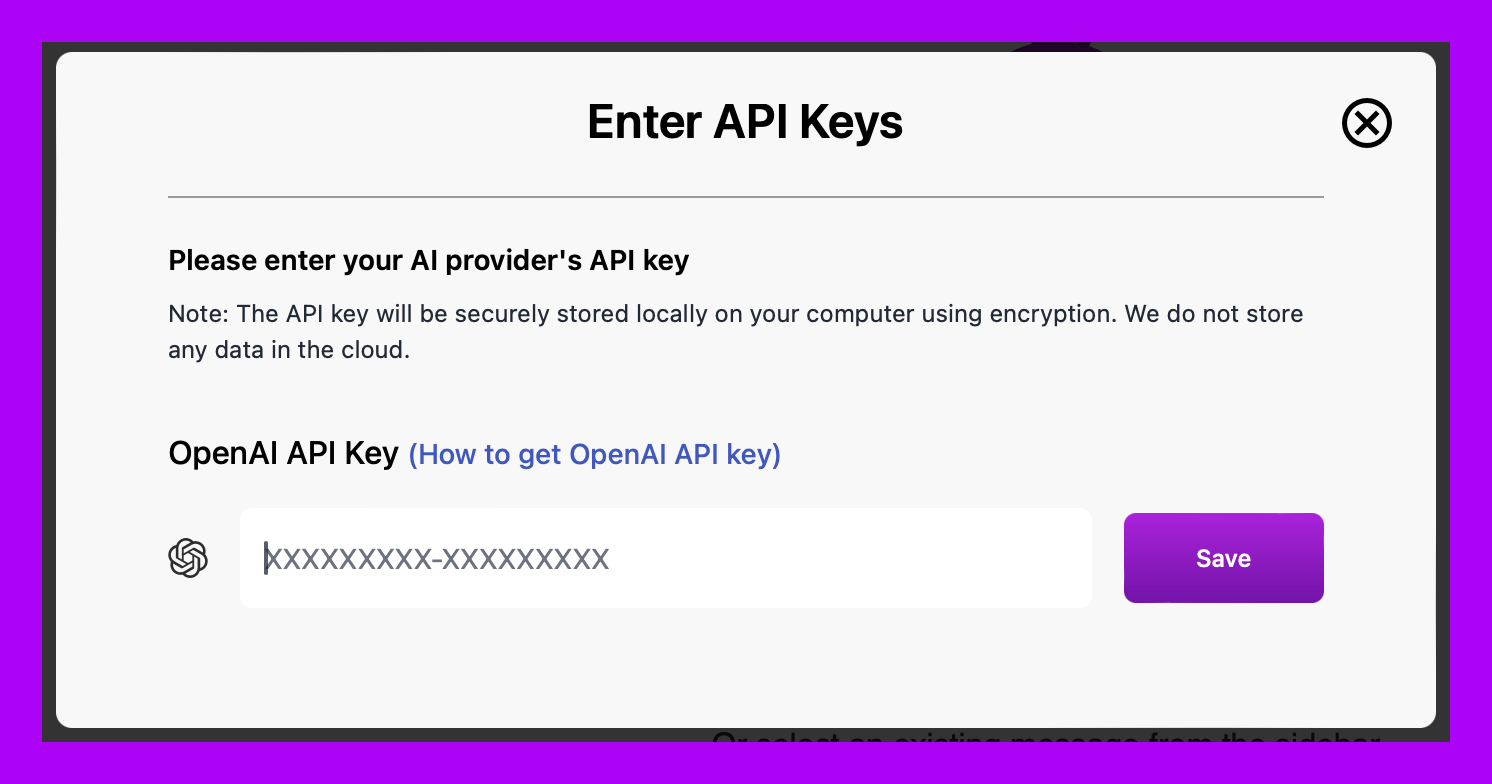
2. Enter AI Provider API Key
Get an OpenAI API key from OpenAI and add it to the application.
If you dont know how to get OpenAI API key, please watch the video tutorial here
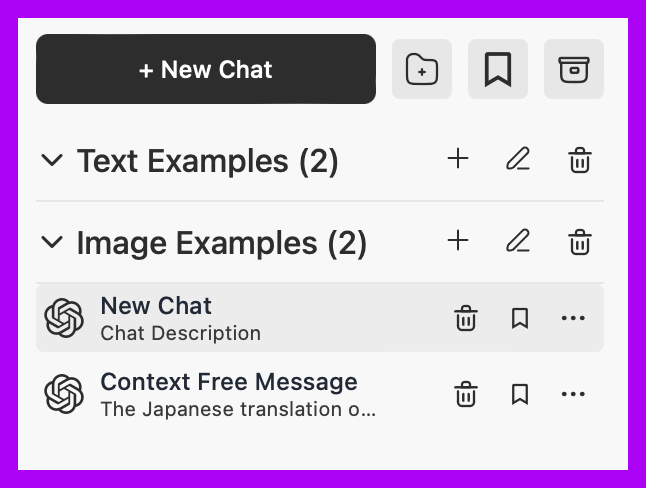
3. Creating New Chat
You can create new chat inside folder using + button or create new folder and add chat inside it.

You can also create new chat using +New Chat button. It will create new chat outside the folder.
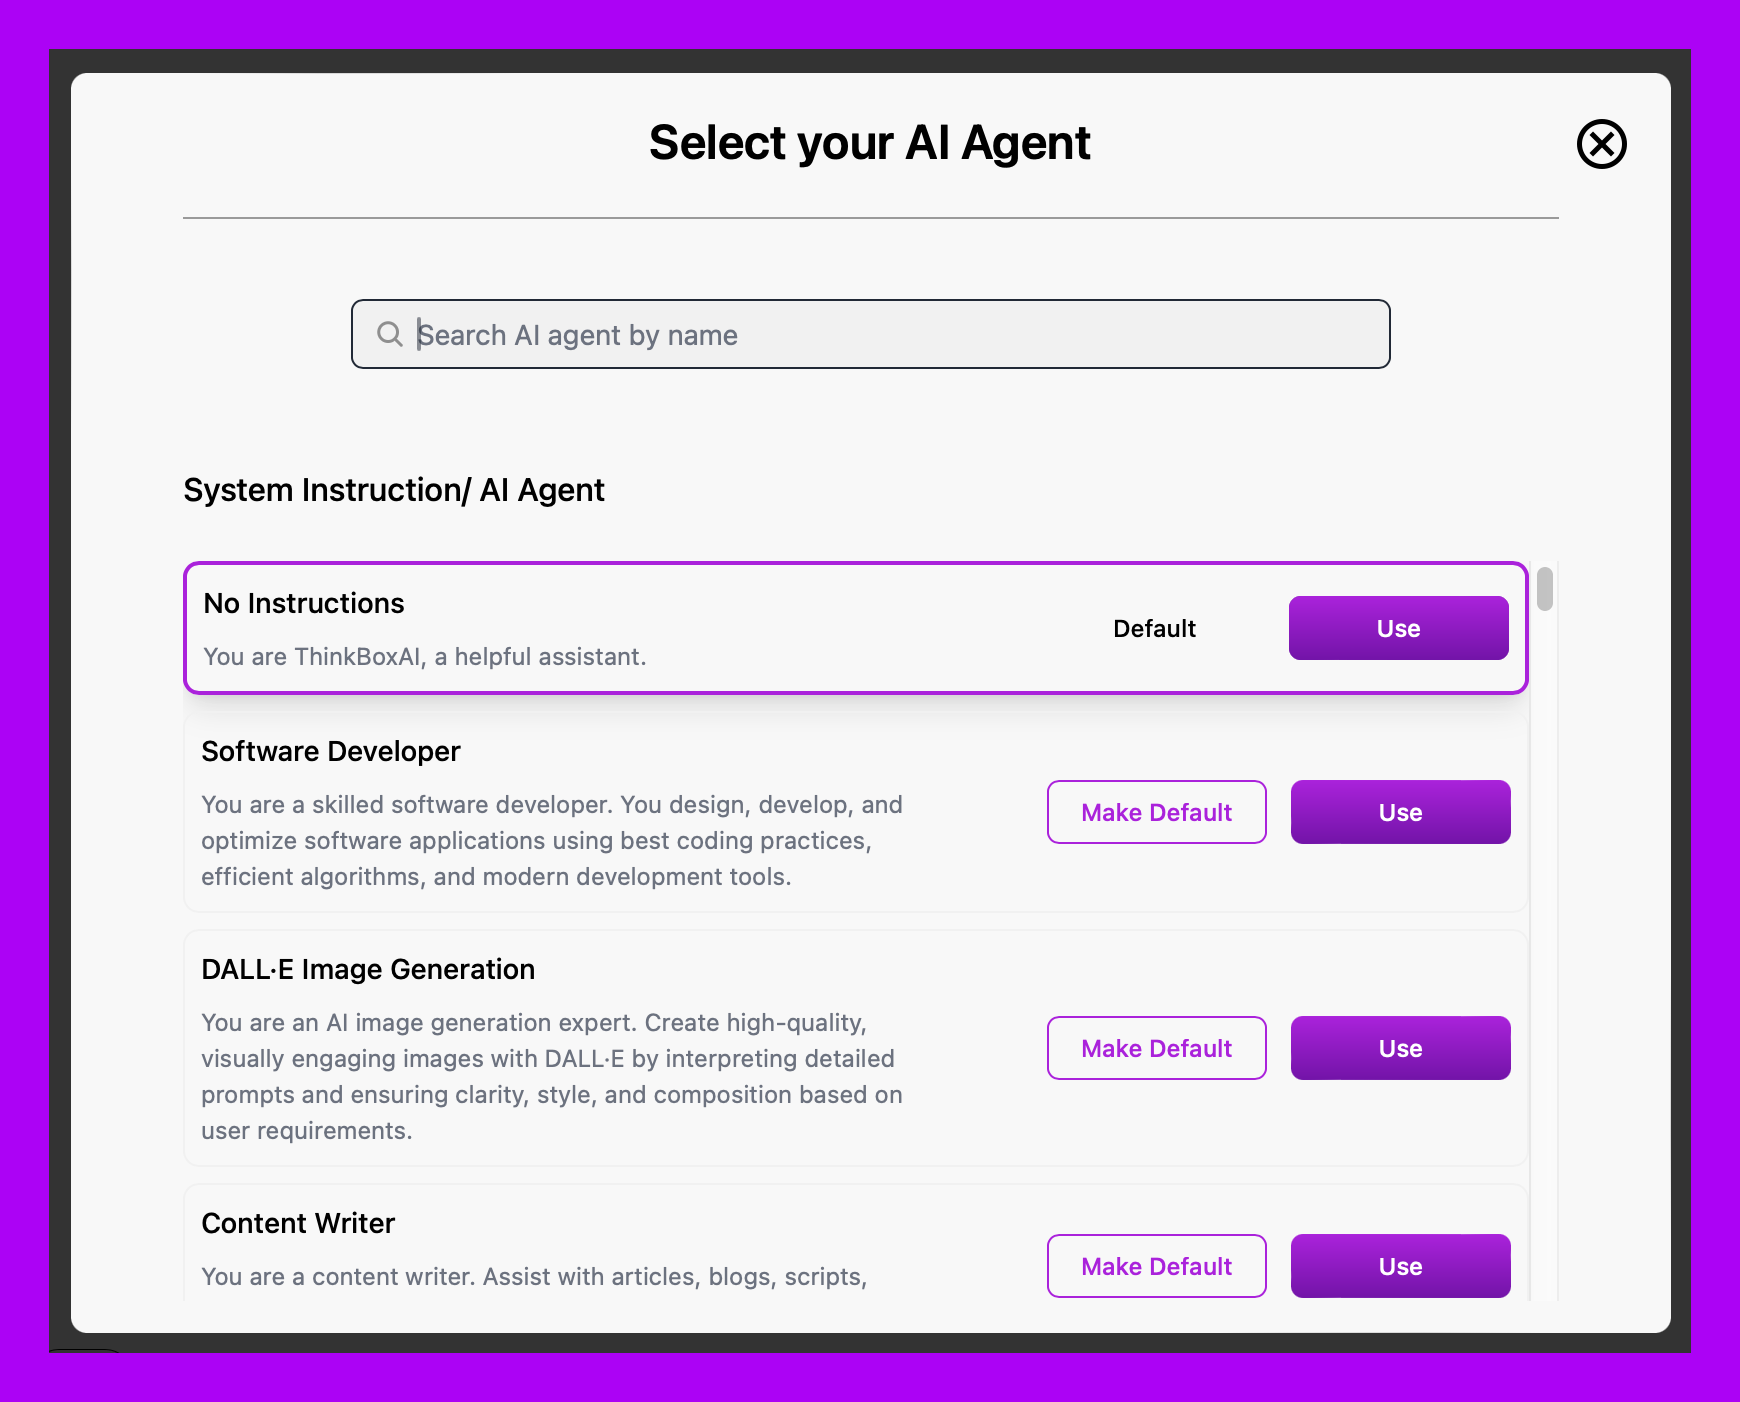
4. Selecting AI System Instruction
You can select system instruction from dropdown menu. It is optional, if you dont want to use system instruction, you can leave as No Instructions.
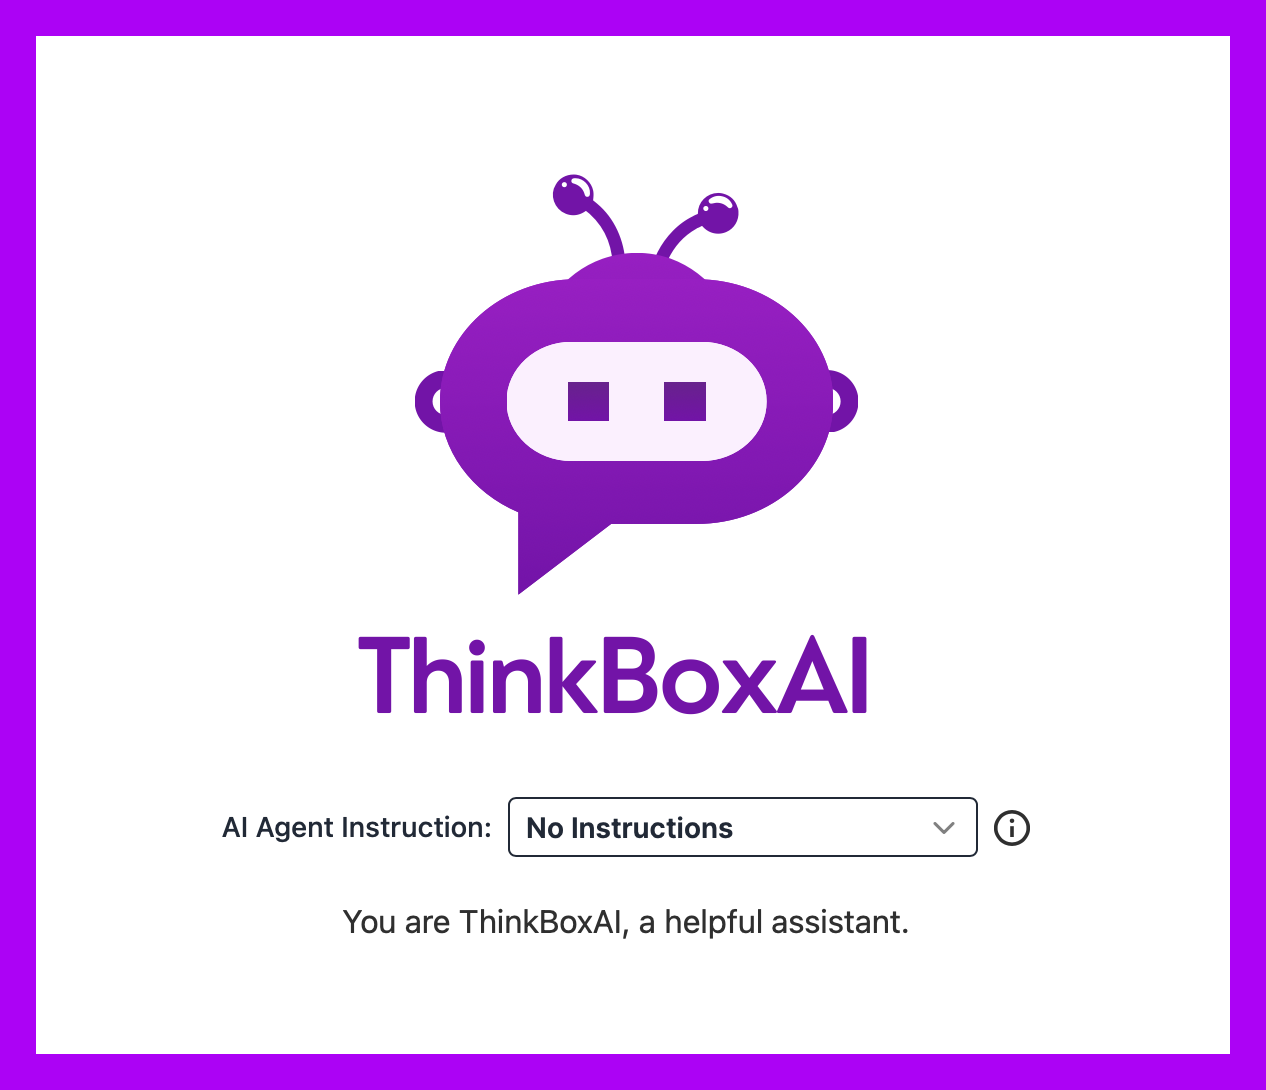
You can also select instruction from available instructions list.
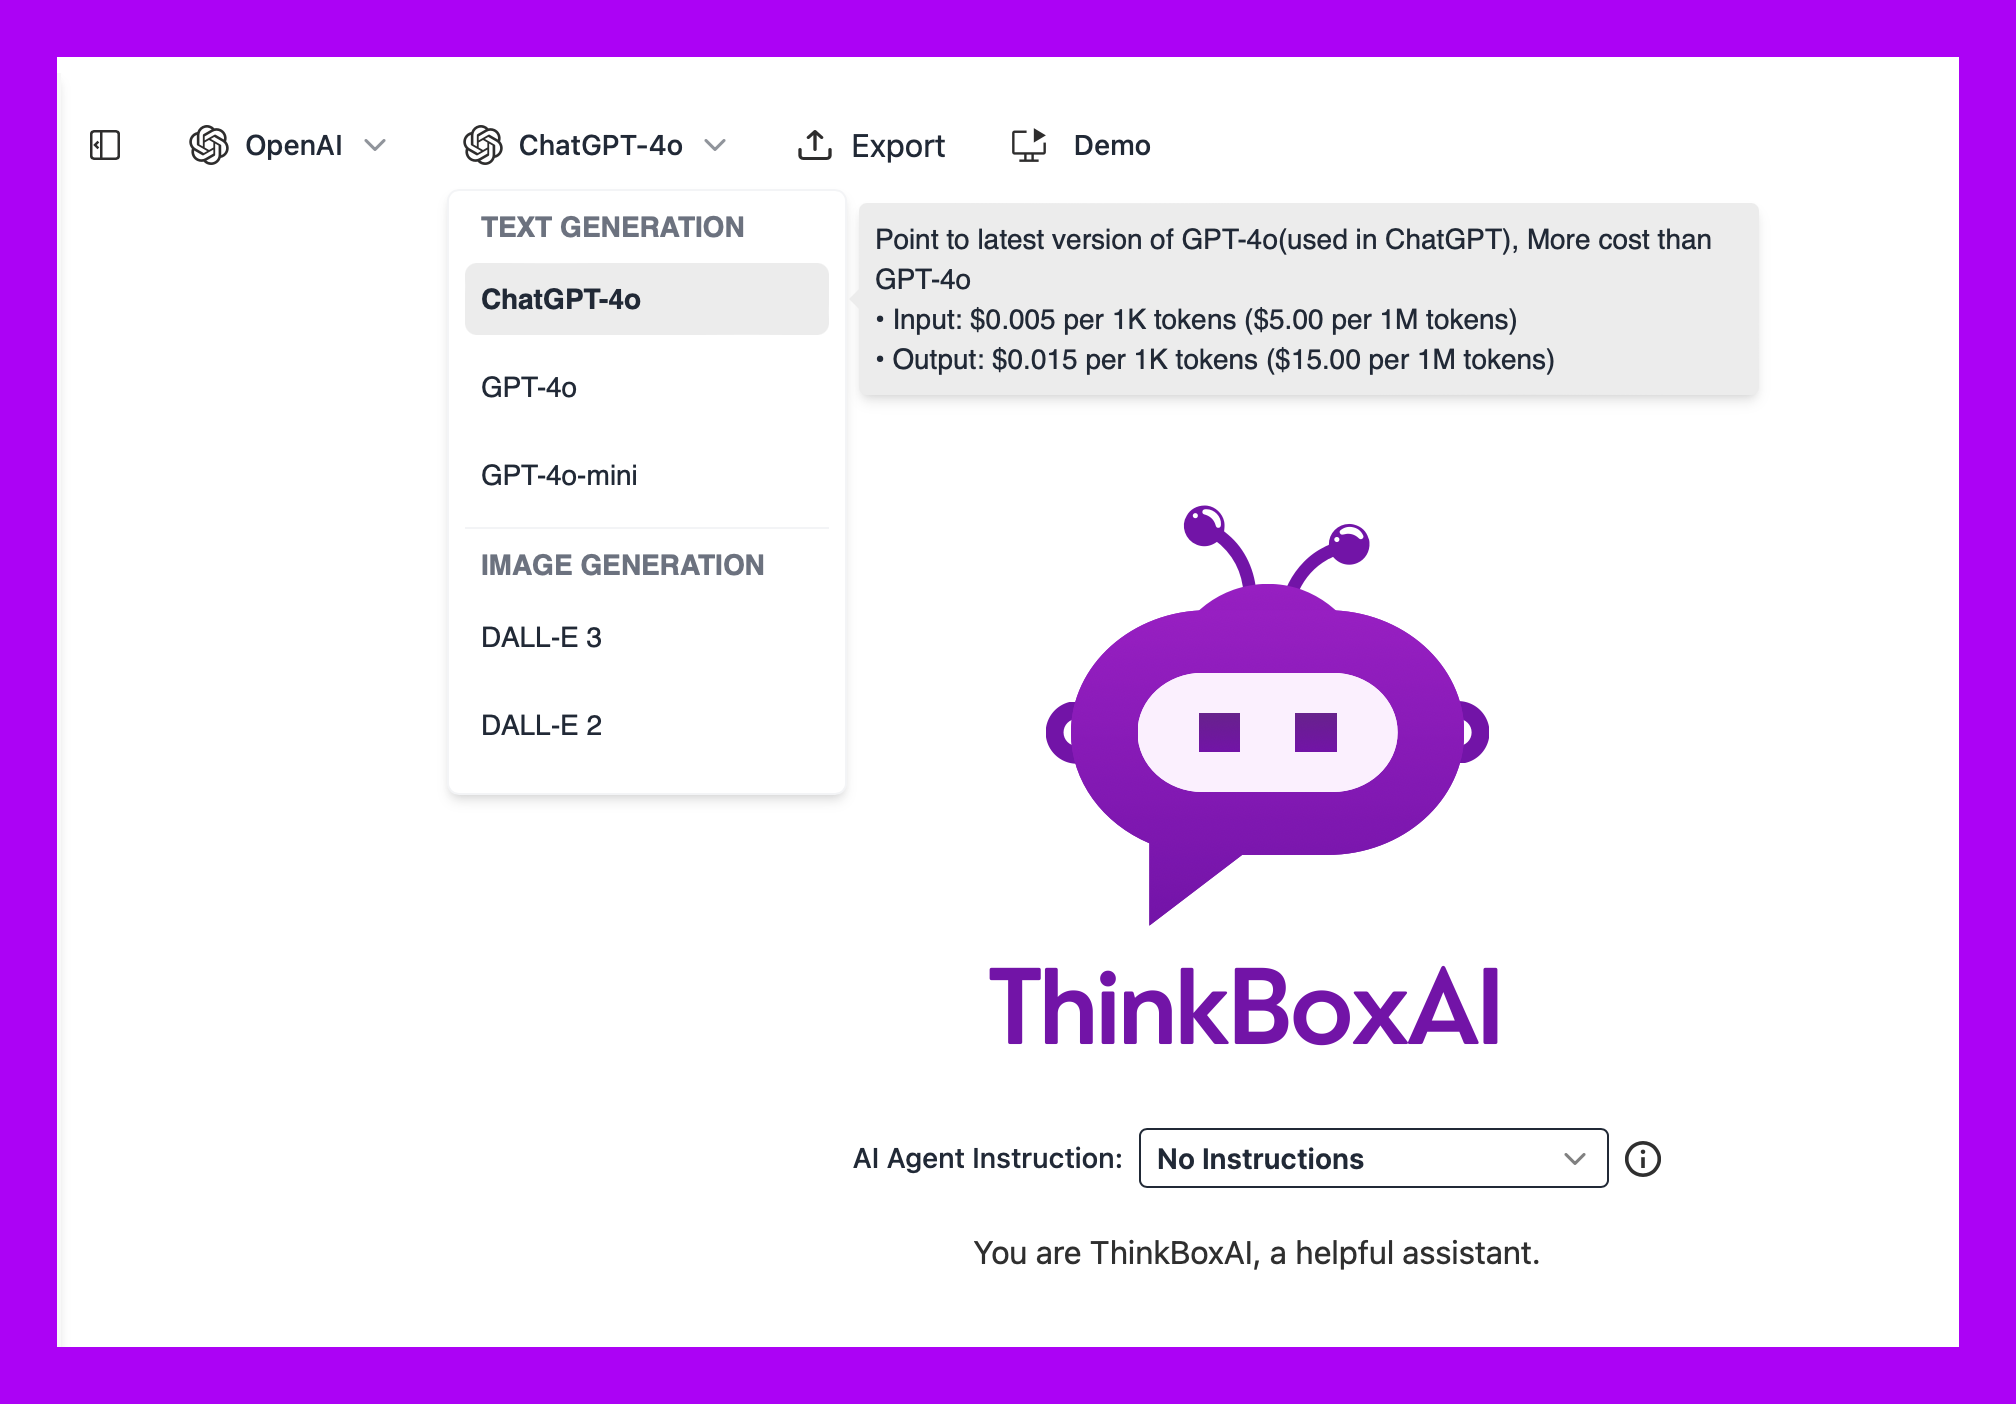
5. Selecting AI Provider and Model
You can select AI provider and model from dropdown menu. There are different models for chat and image generation. You can also check pricing/cost of the model token by hovering on the model name.
6. Streaming and Enter to Send Message Options
If you want streaming response, you can check Stream checkbox.
If you want to send message by pressing Enter key, you can check Enter to Send checkbox.

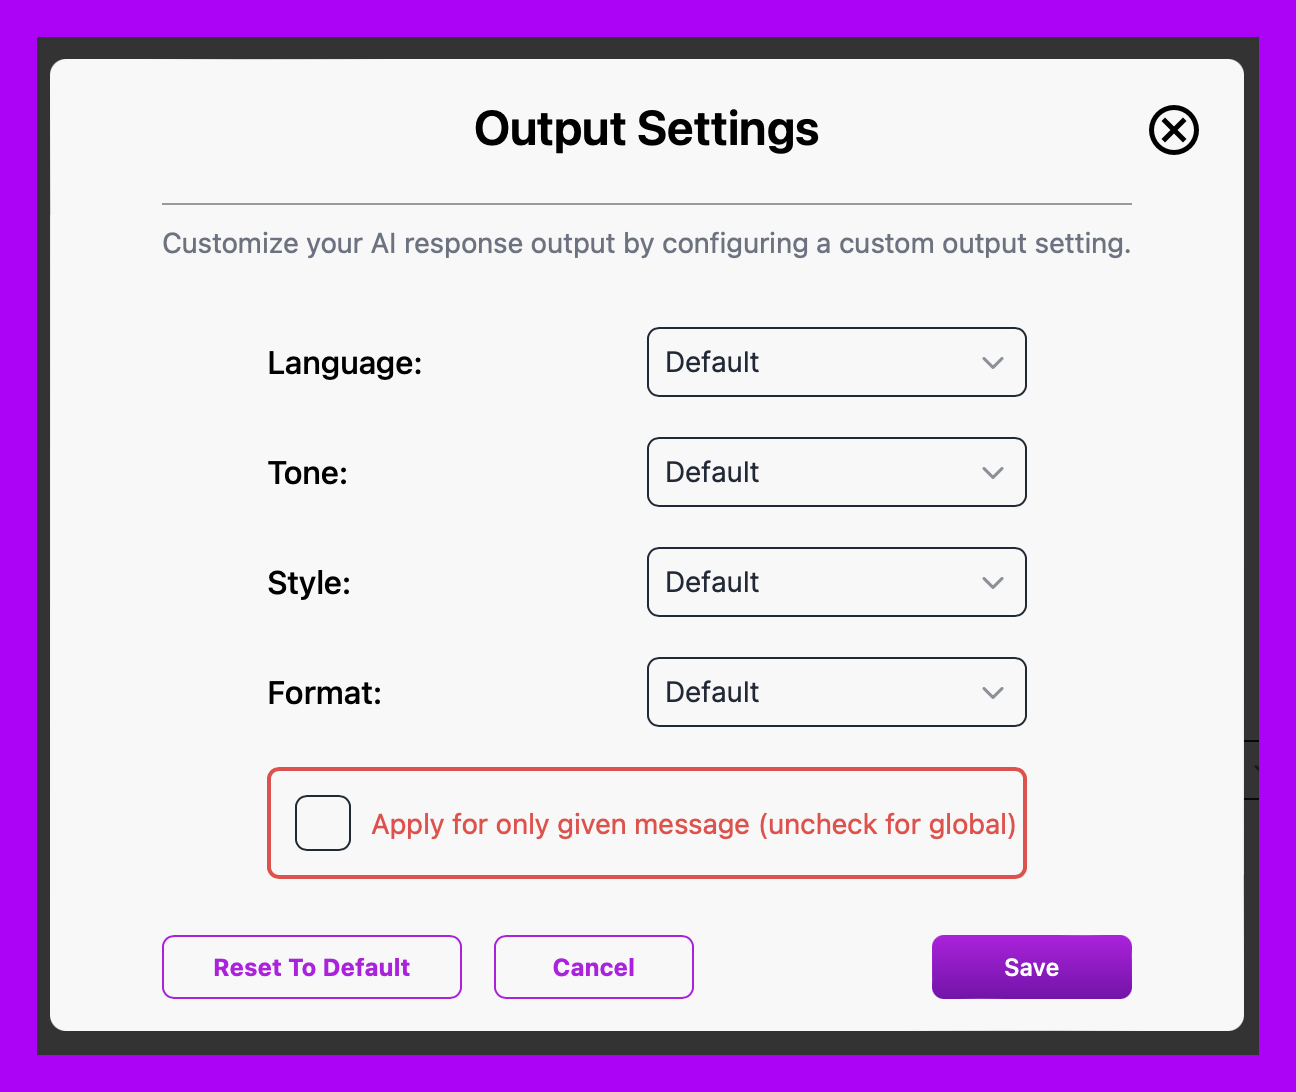
7. Output Settings
You can customize output settings by selecting the Language, Tone, Writing Style, and Format for the AI's responses. These settings can be applied globally by unchecking the checkbox, or you can check it to apply the settings only to the current message.
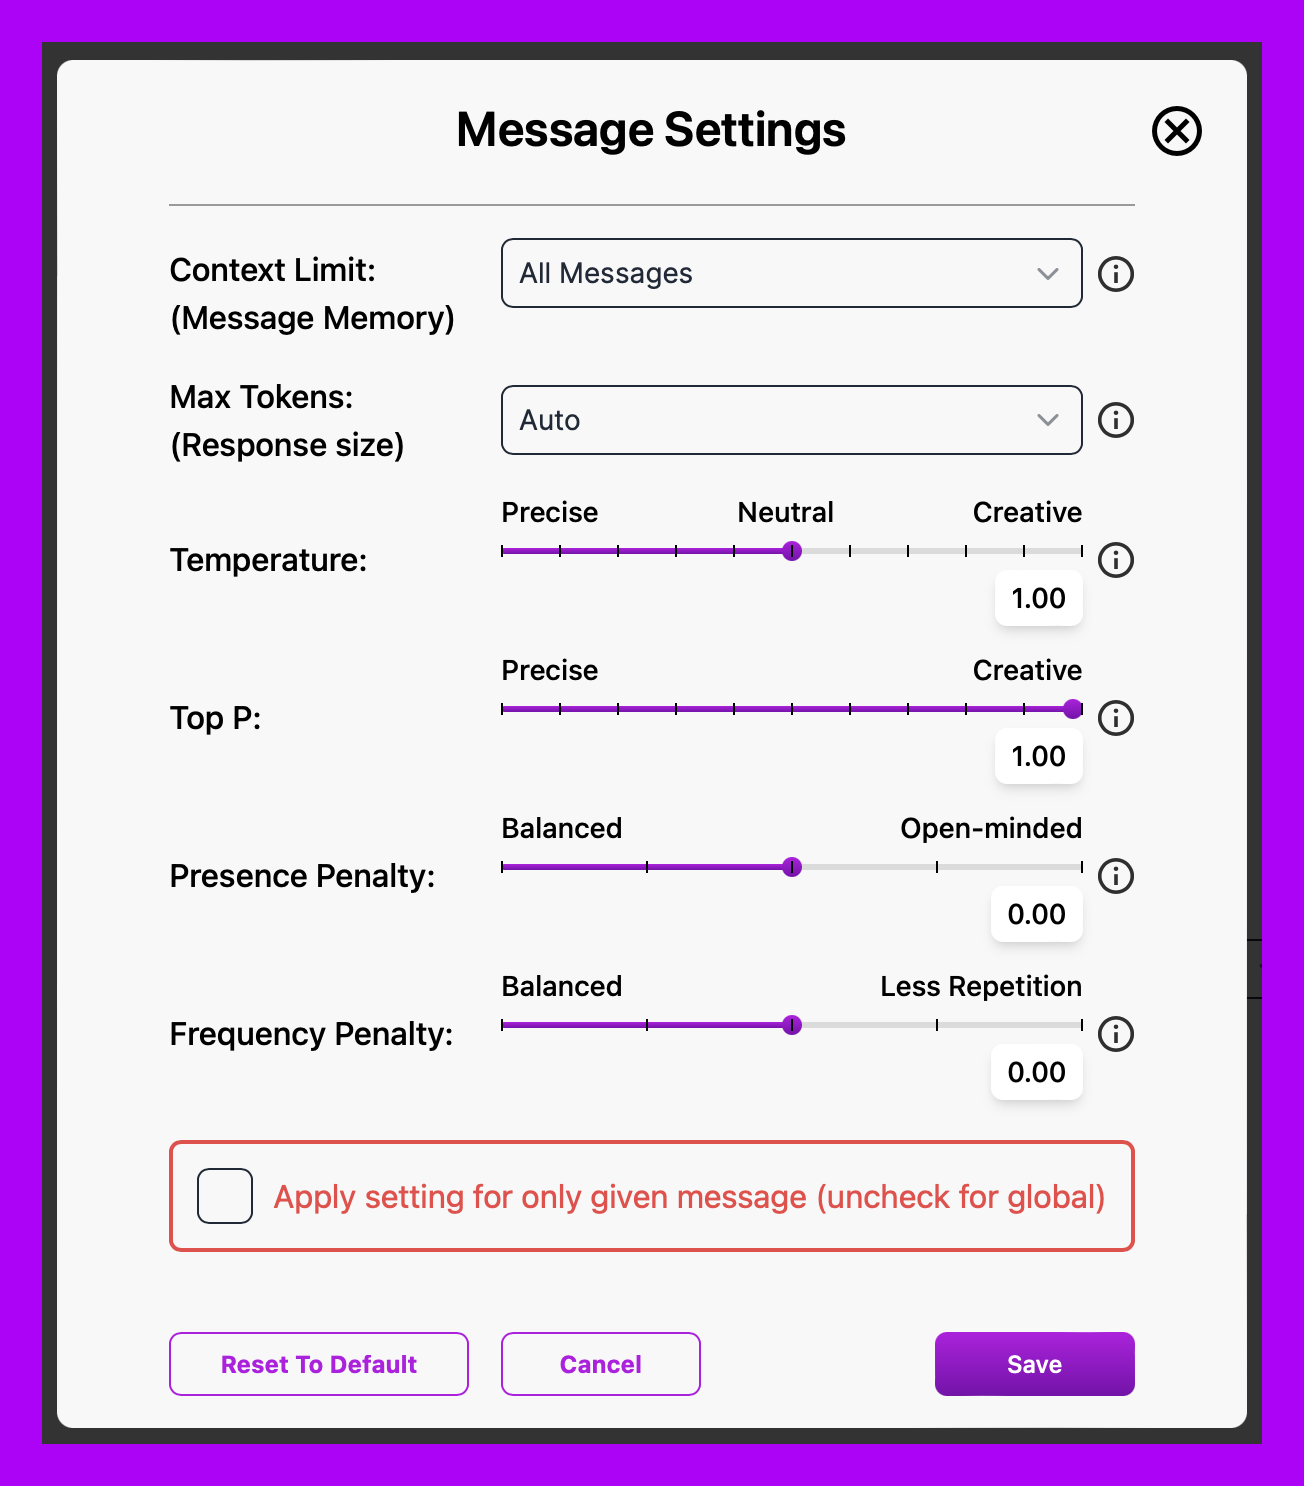
8. Message Settings
You can customize message settings by selecting appropriate parameters. You can get more details on info icon hover. Make checkbox checked if you want to apply settings for current message.
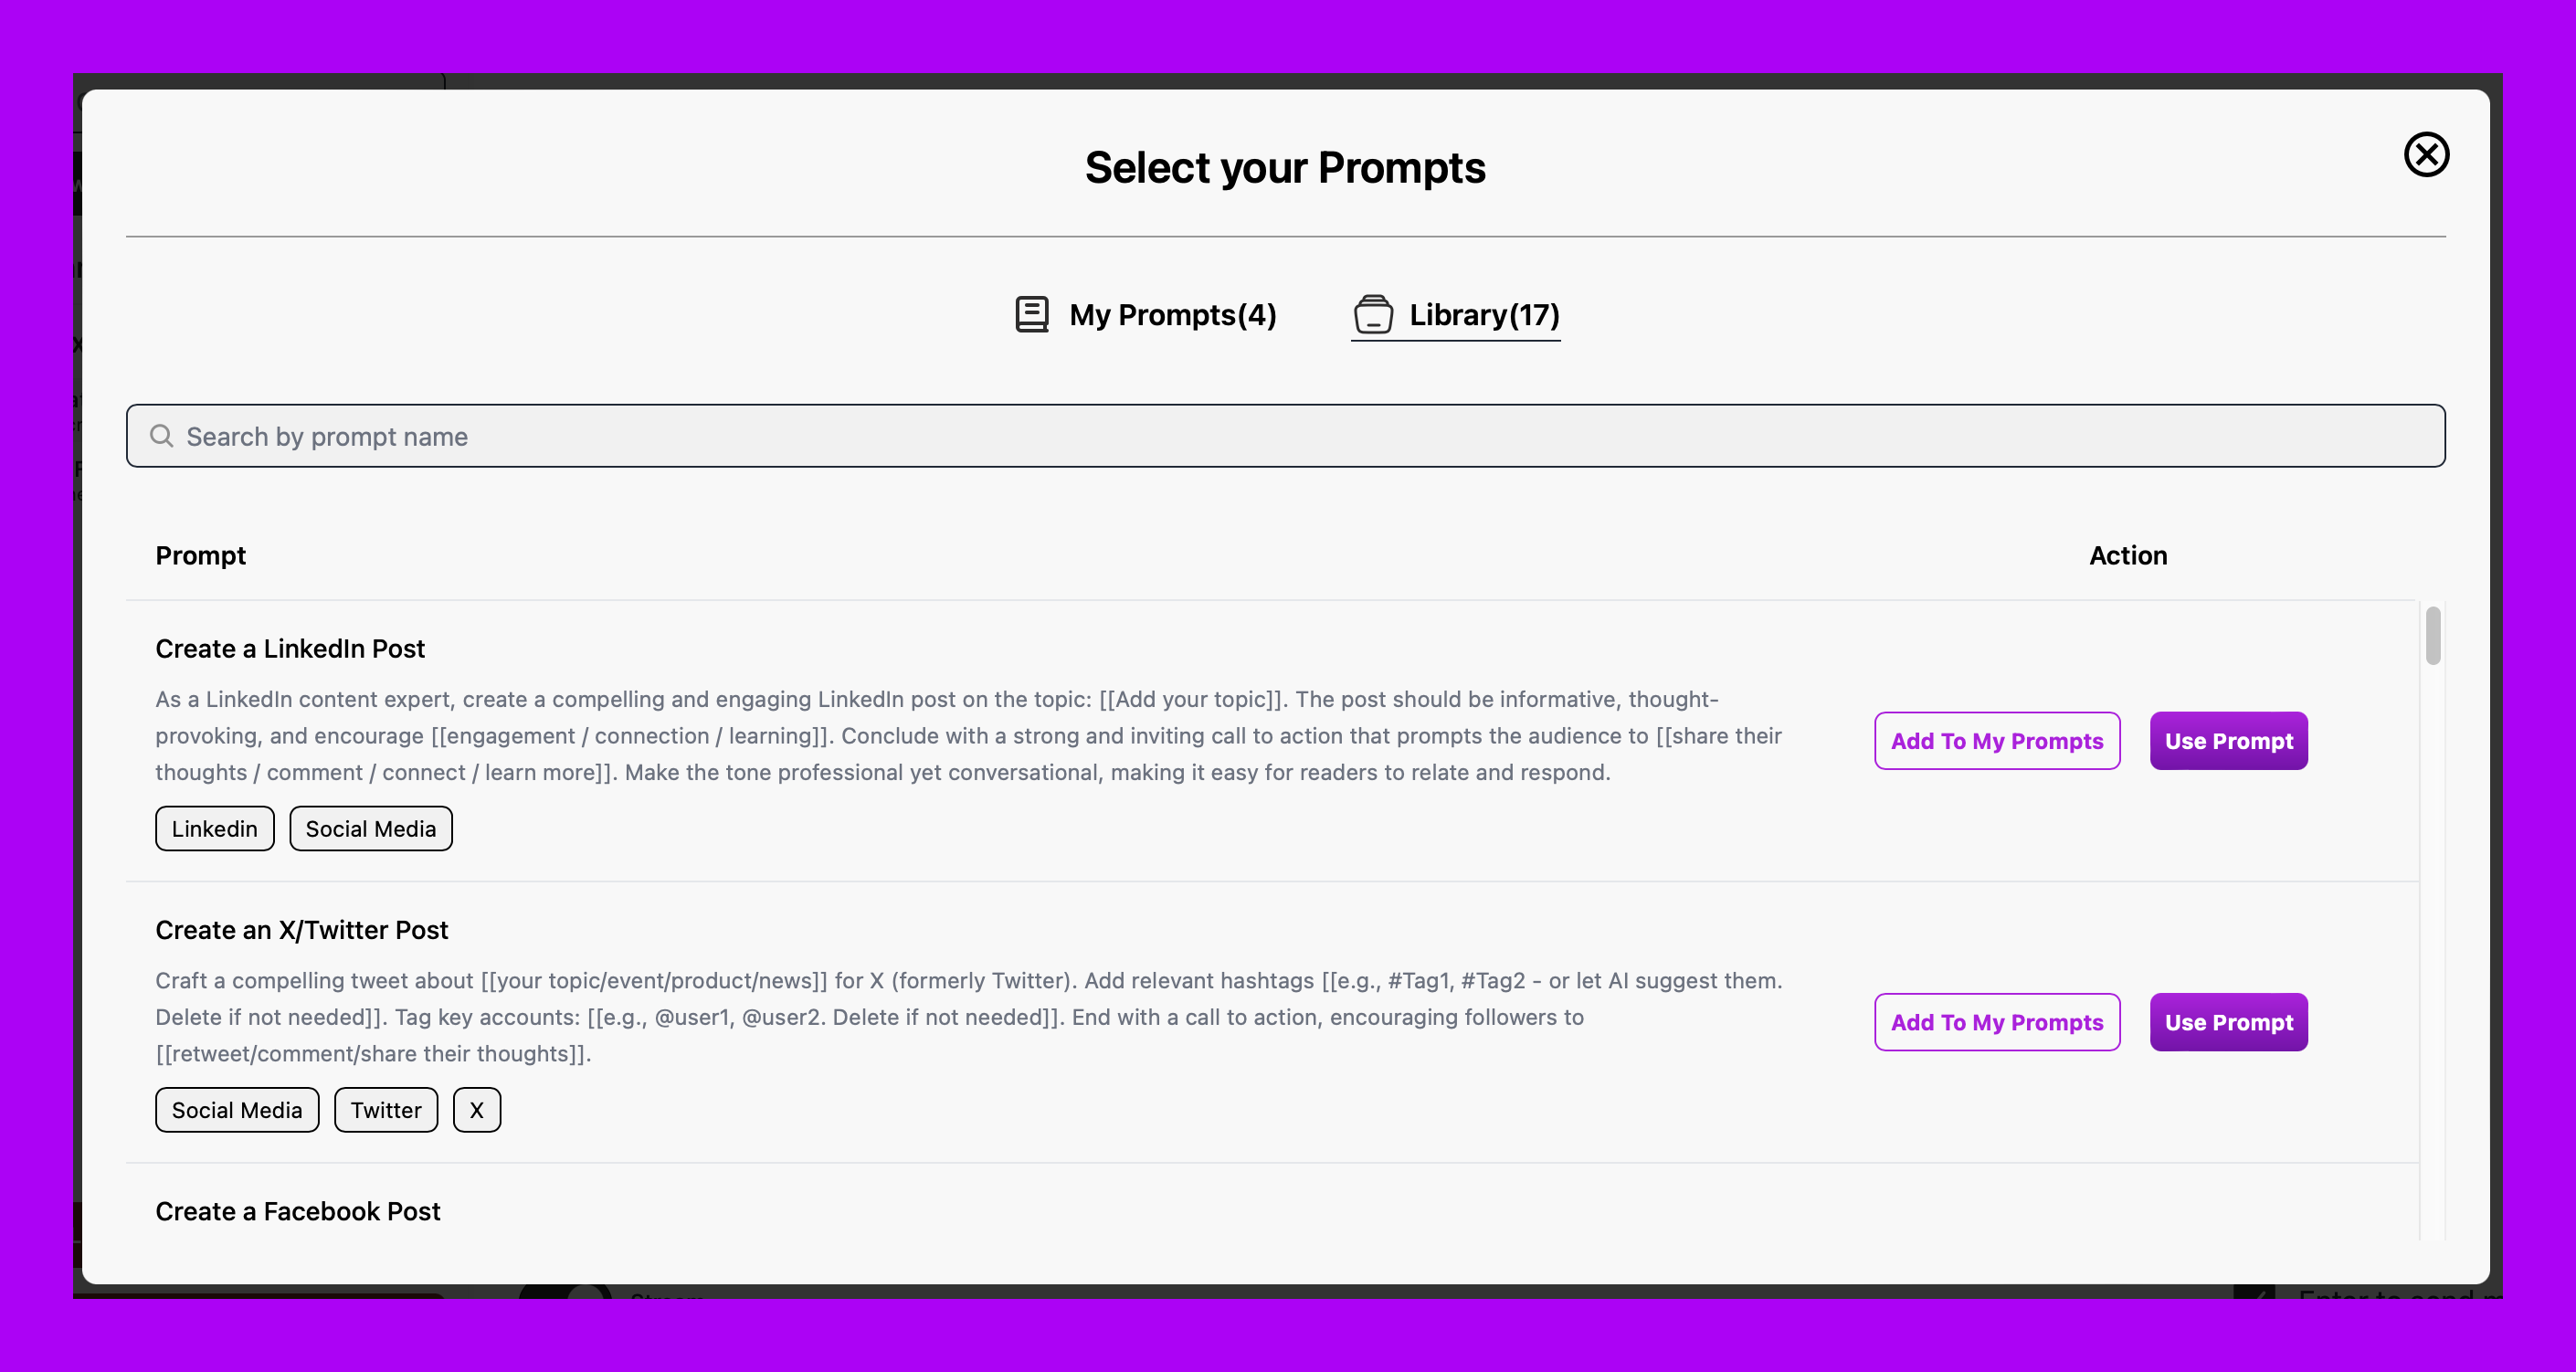
9. Prompt Library
You can create your own prompt or add from library.
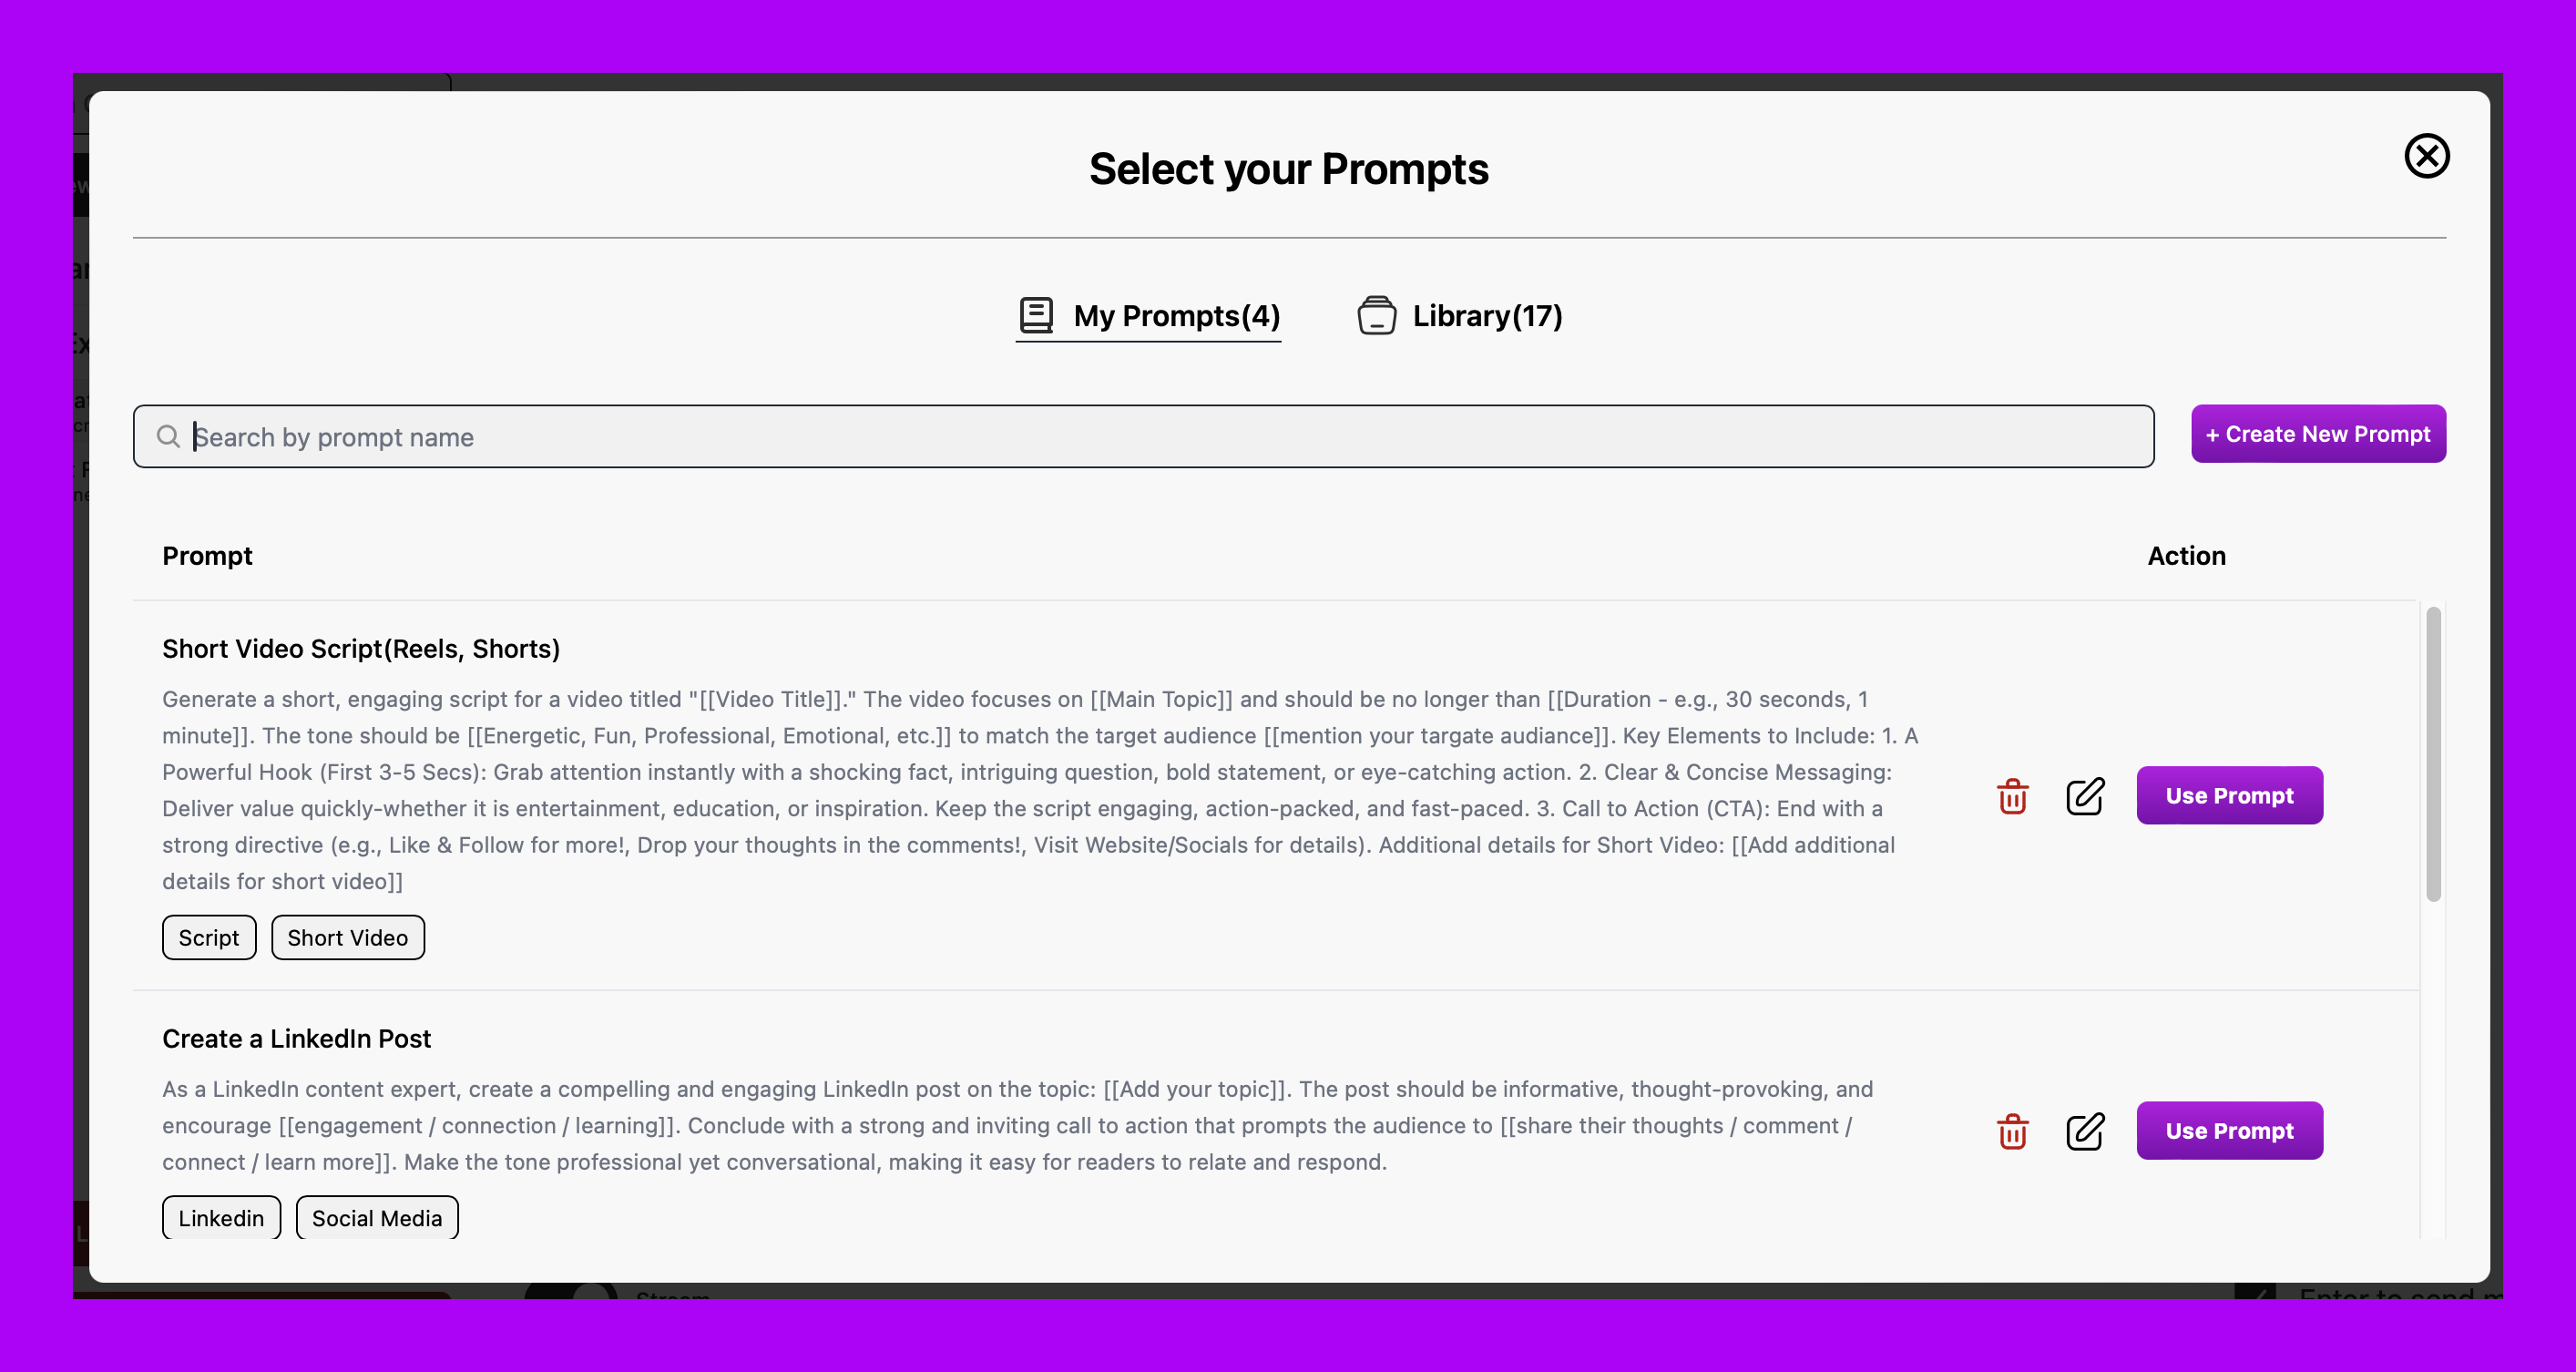
You can use library prompt or add to My Prompt and modify it.
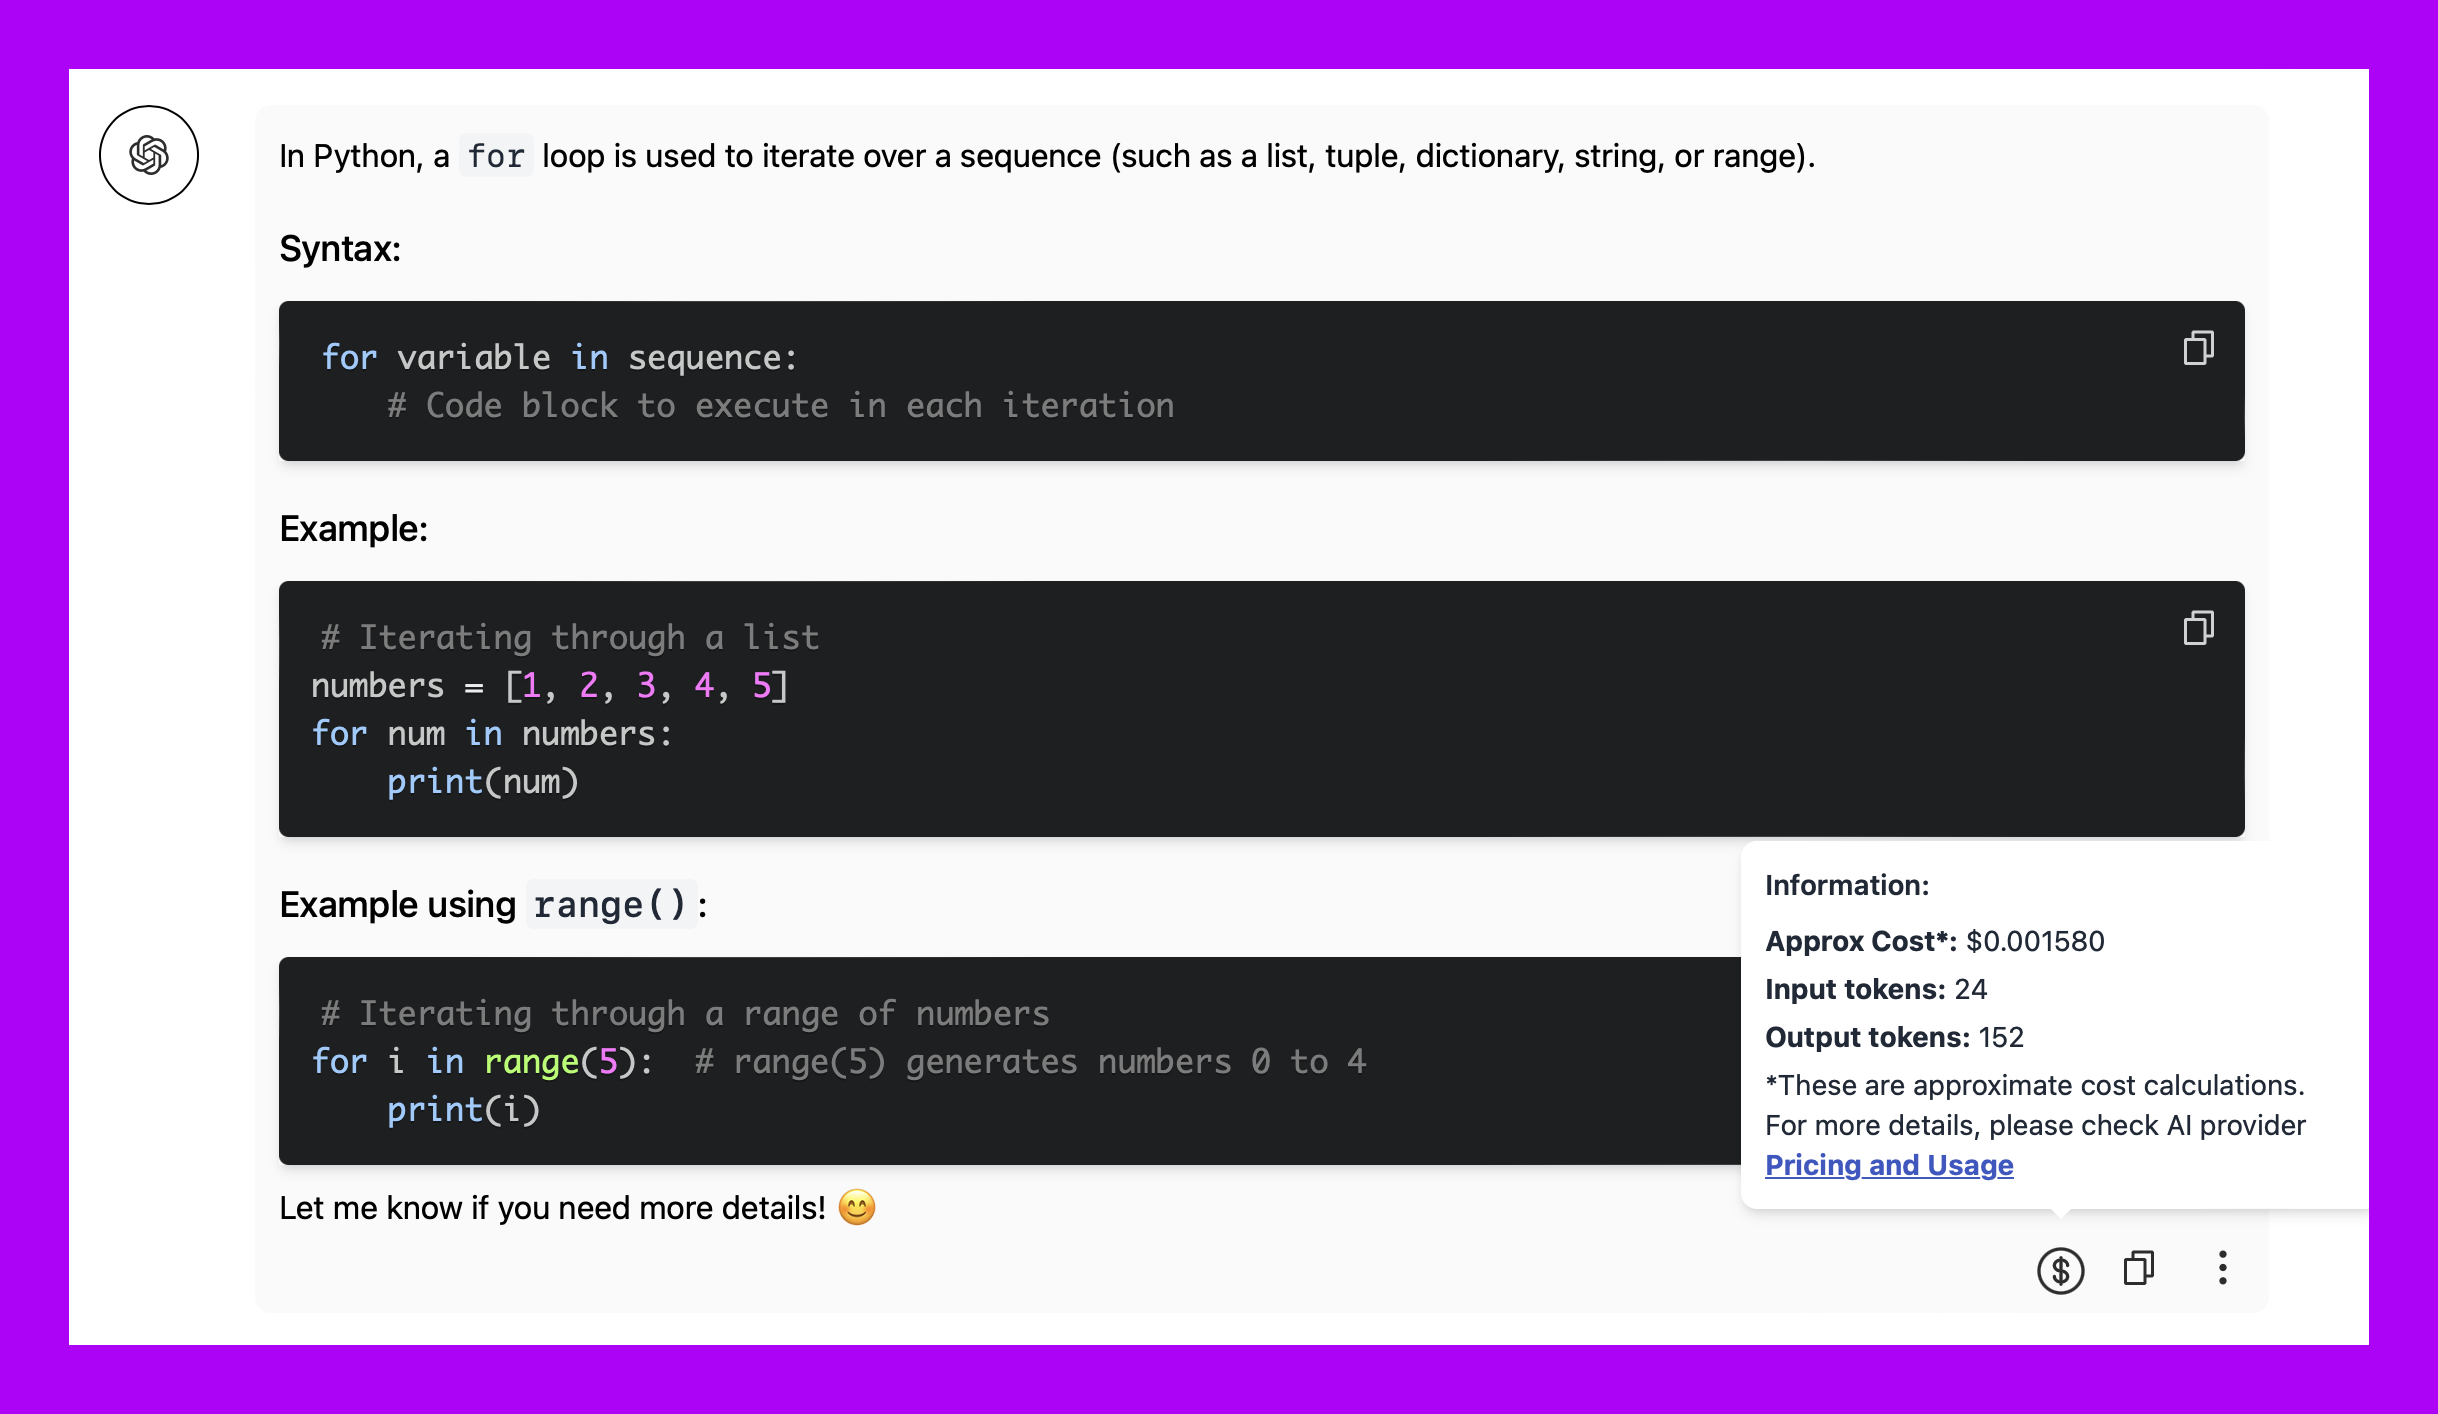
10. Chat Response
You can copy and delete chat response. Also you can check how much it cost you by hovering on the cost icon. Note: It is approximate cost. You can check exact pricing and details from our blog here.
11. Folder and Message Arrangement
You can create new folder by clicking on Folder icon.
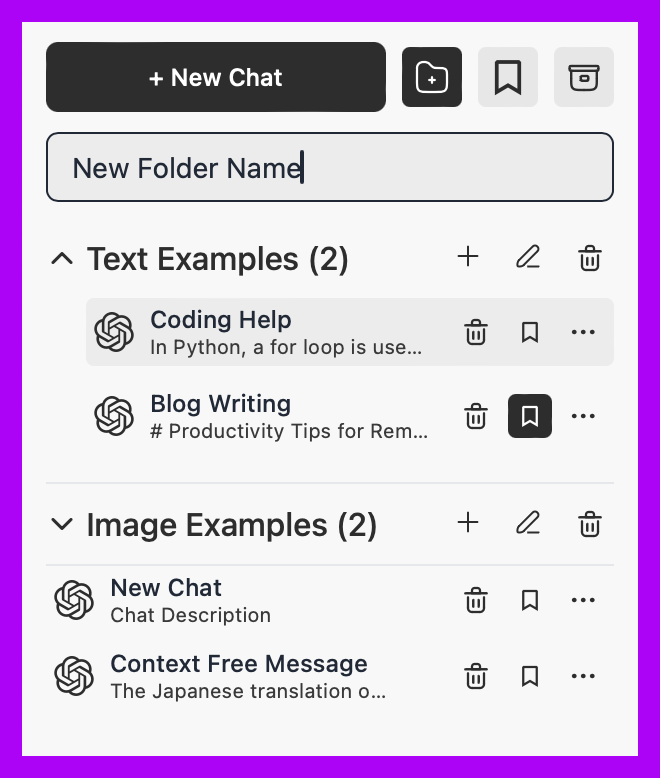
You can also add chat to folder by clicking on + button in folder.
12. Bookmark and Archive
You can bookmark chat by clicking on Bookmark icon.
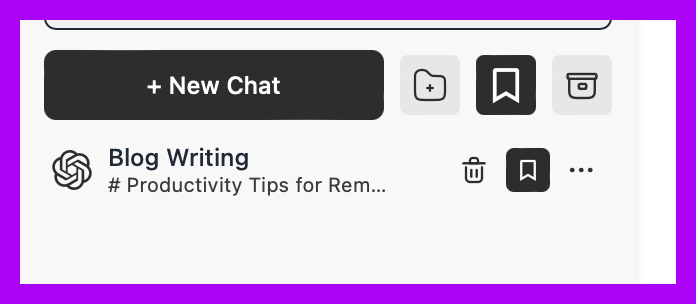
You can existing check archived chat by clicking on Archive icon. or if you want to archive chat, you can click on ... of particular message and select Archive option.
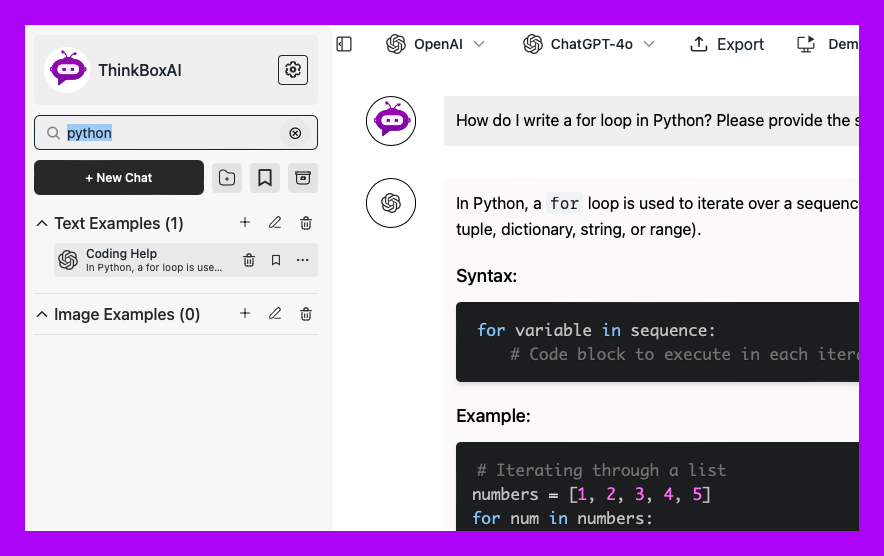
13. Search Chat Content
You can search chat content by typing in the search bar.
14. Theme Change
You can change theme to dark or light mode.

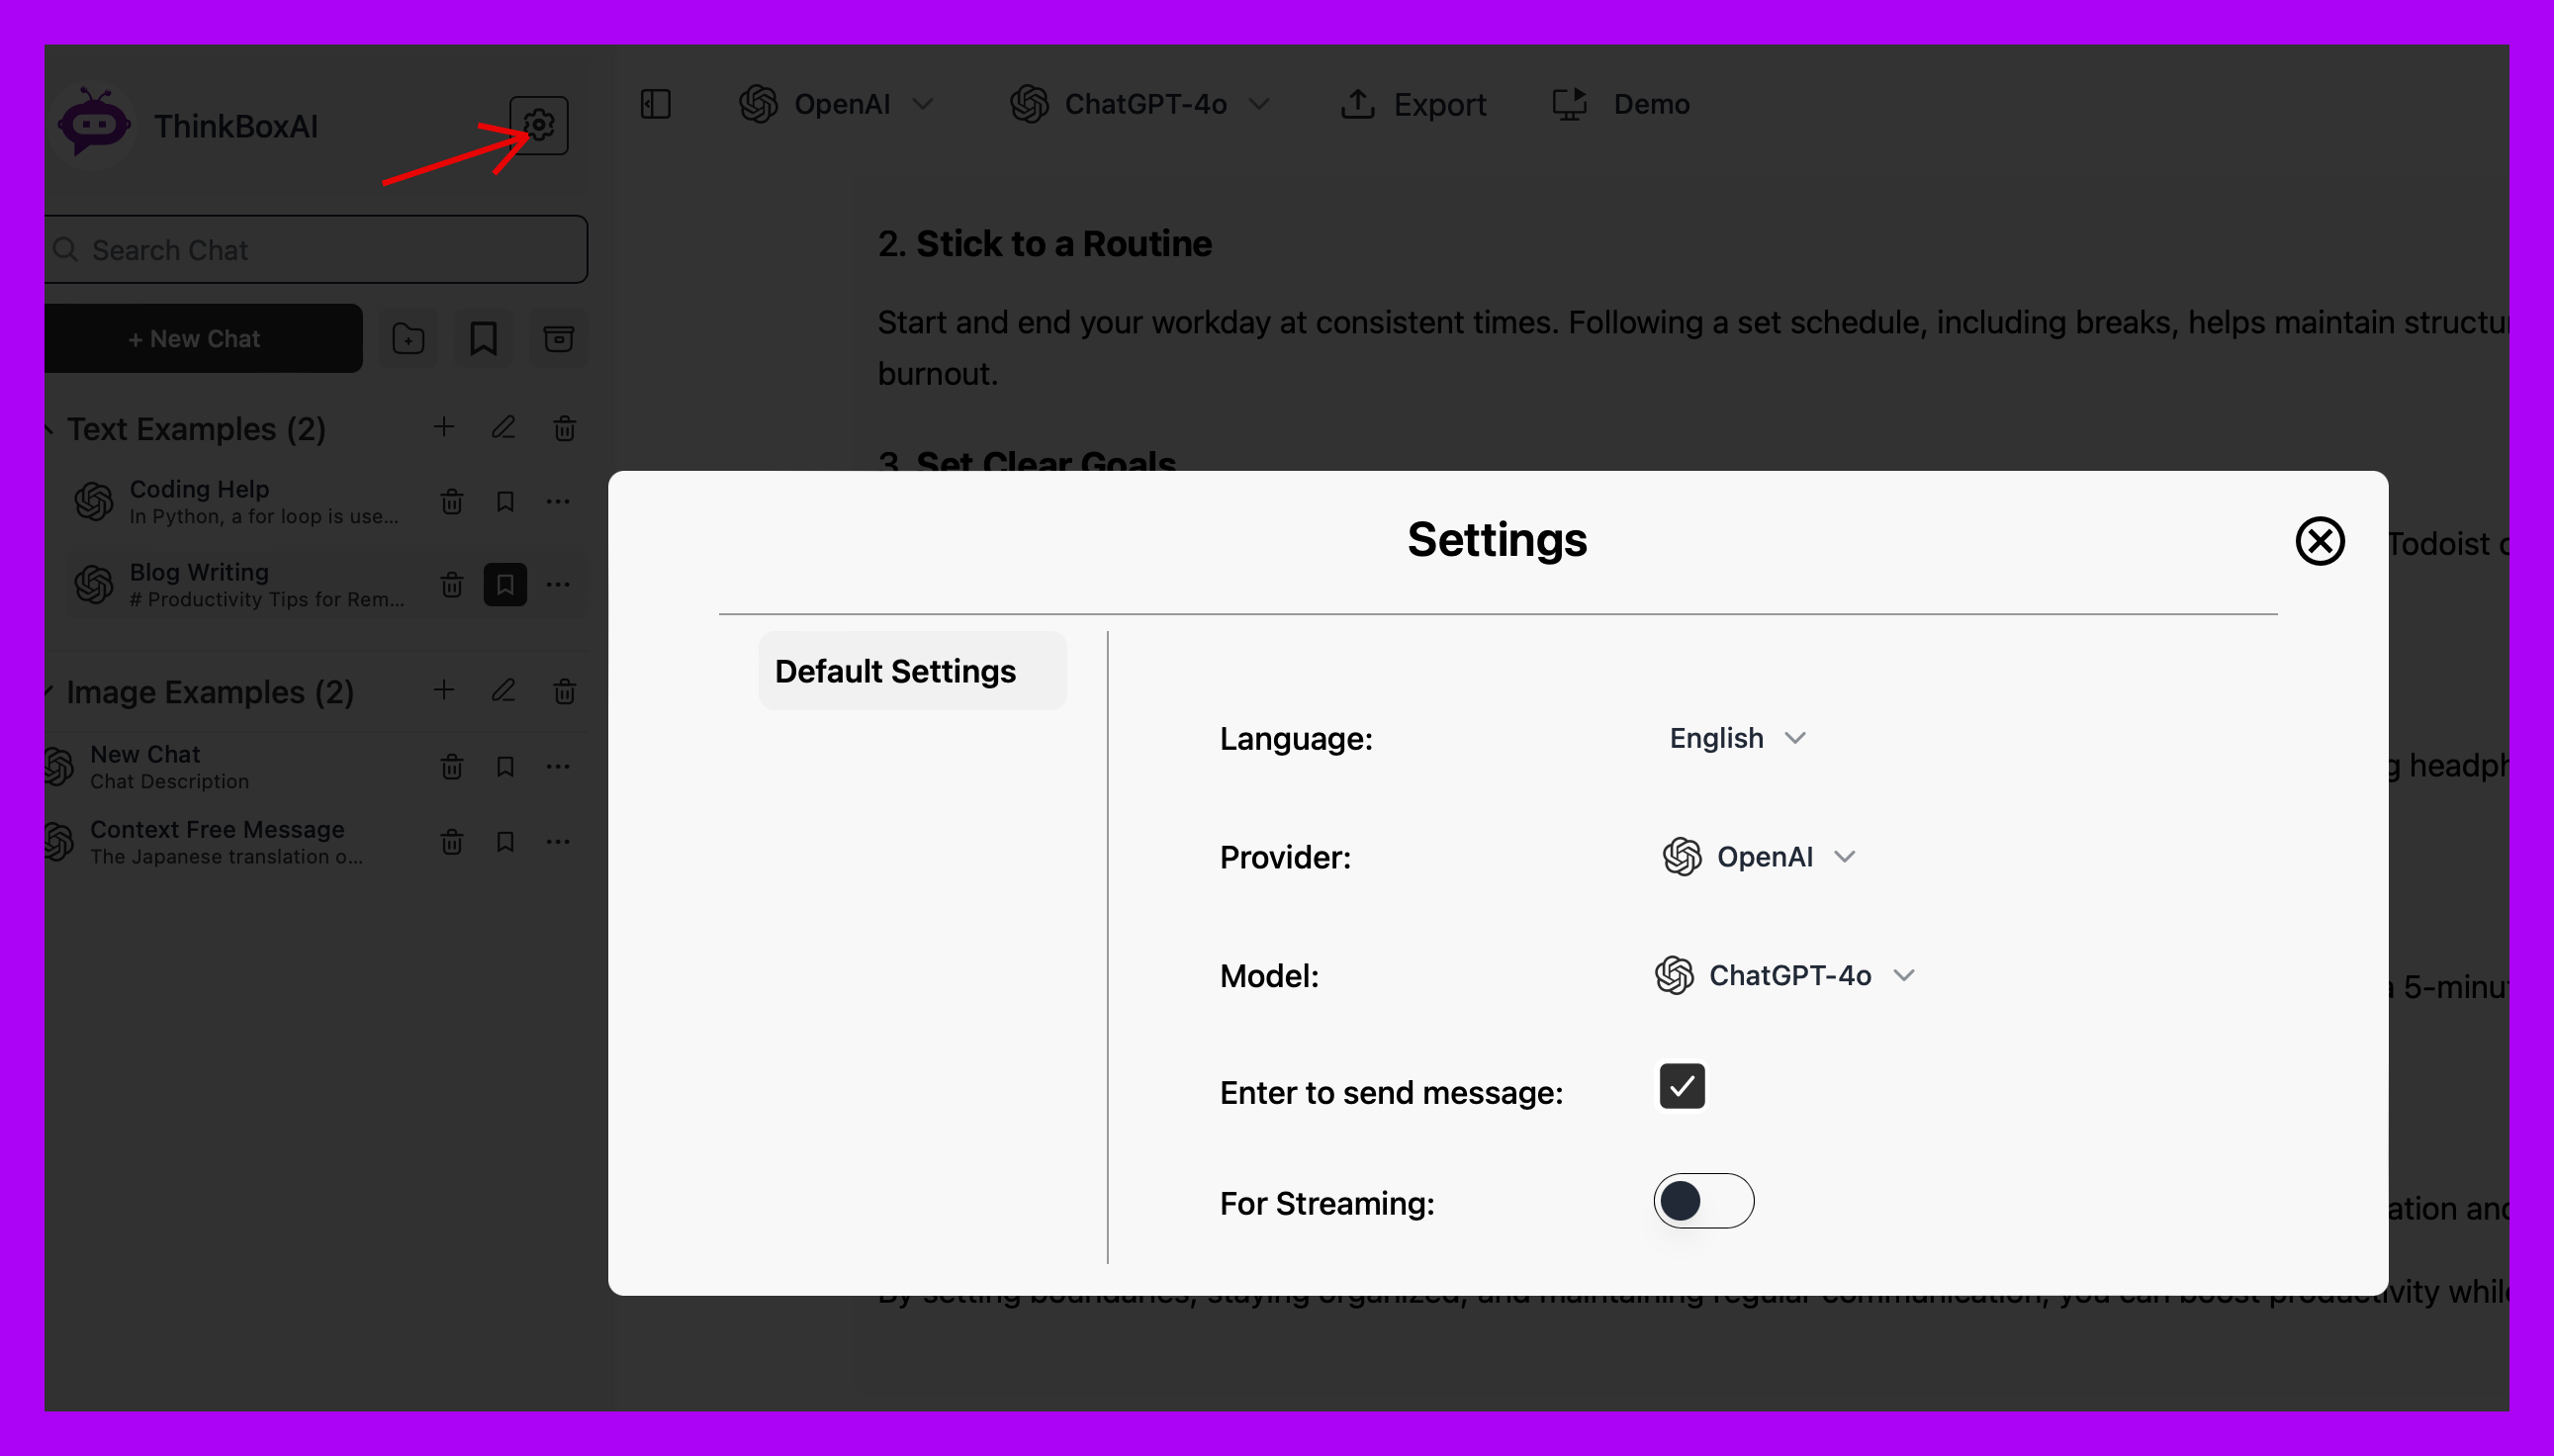
15. Default Settings
You can customize default settings by selecting the parameters. Now whenever you create new chat, it will use these settings.
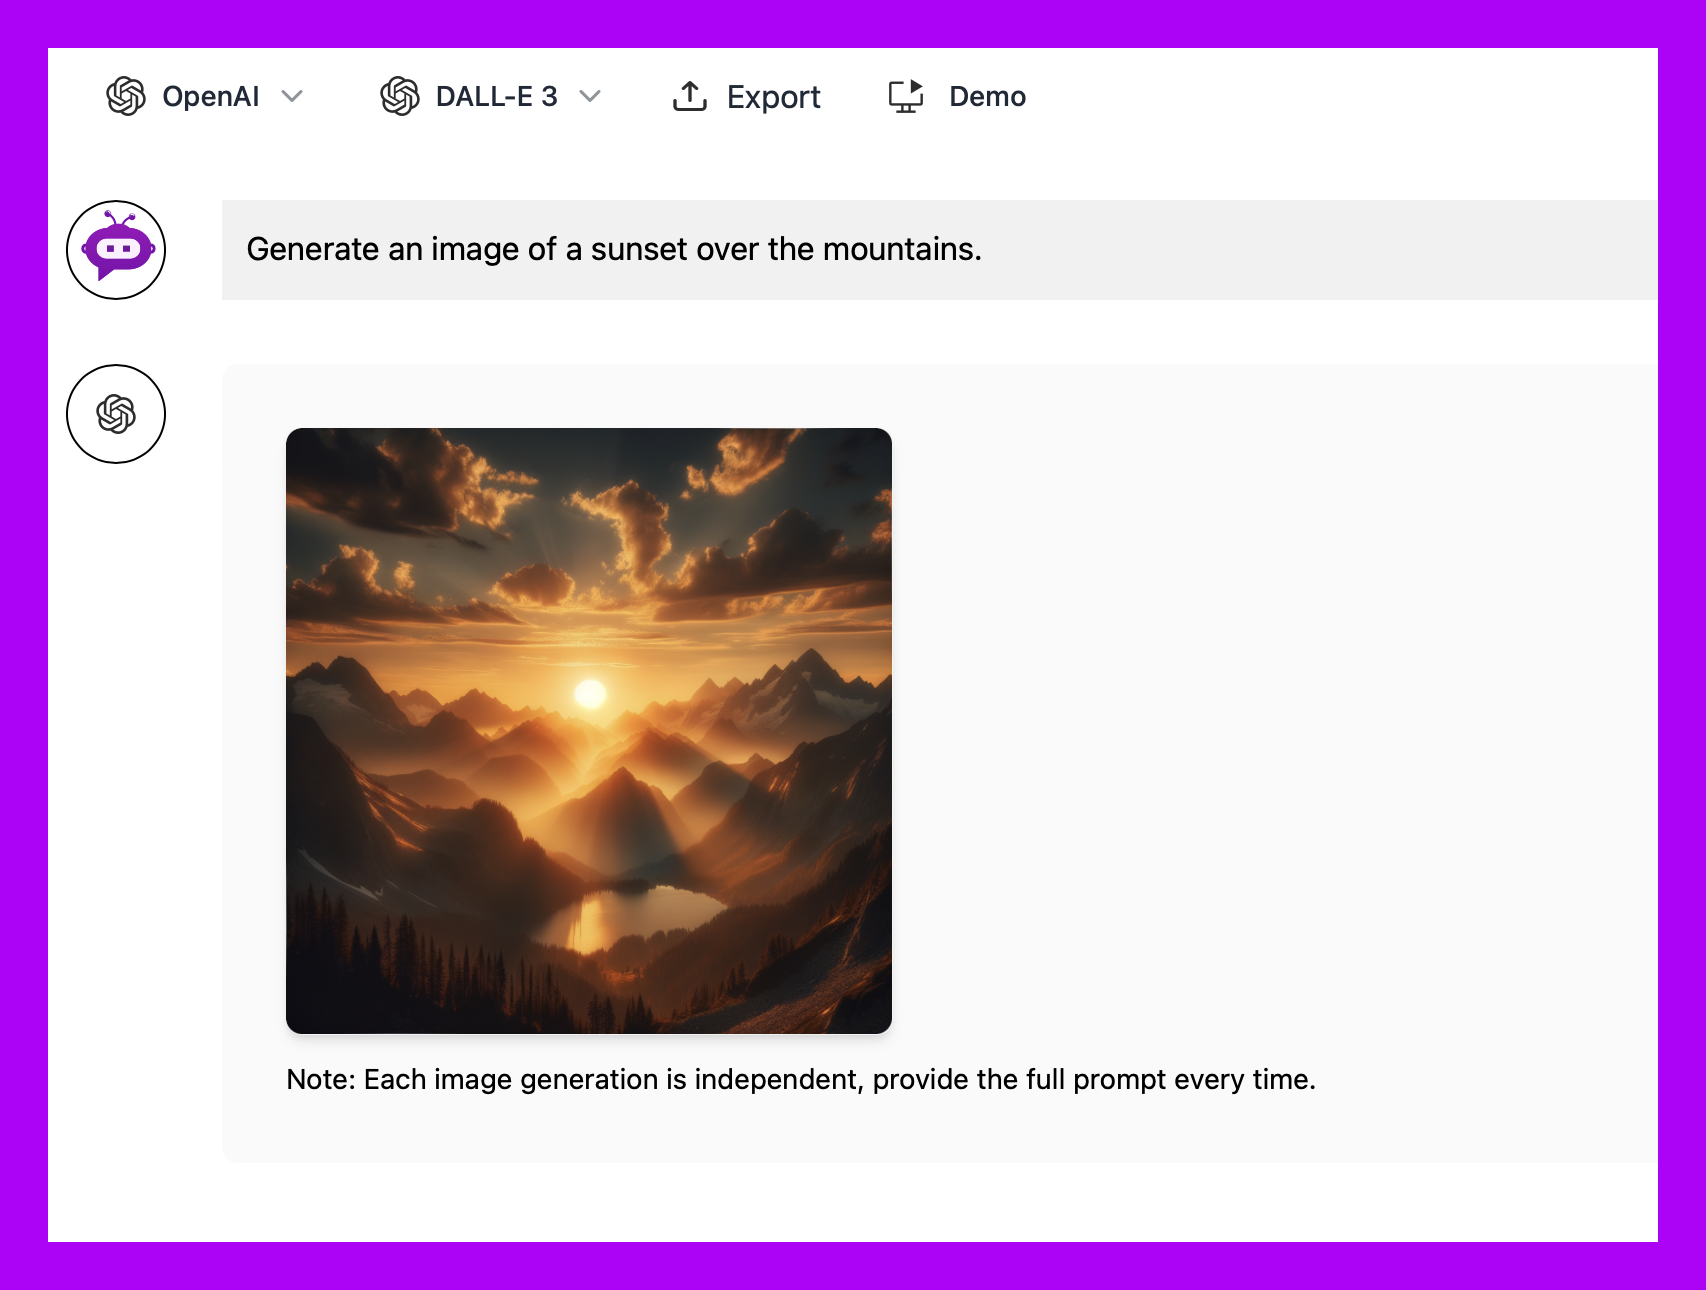
16. Image Generation
You can generate image by selecting DALL-E 3 or DALL-E 2 model.
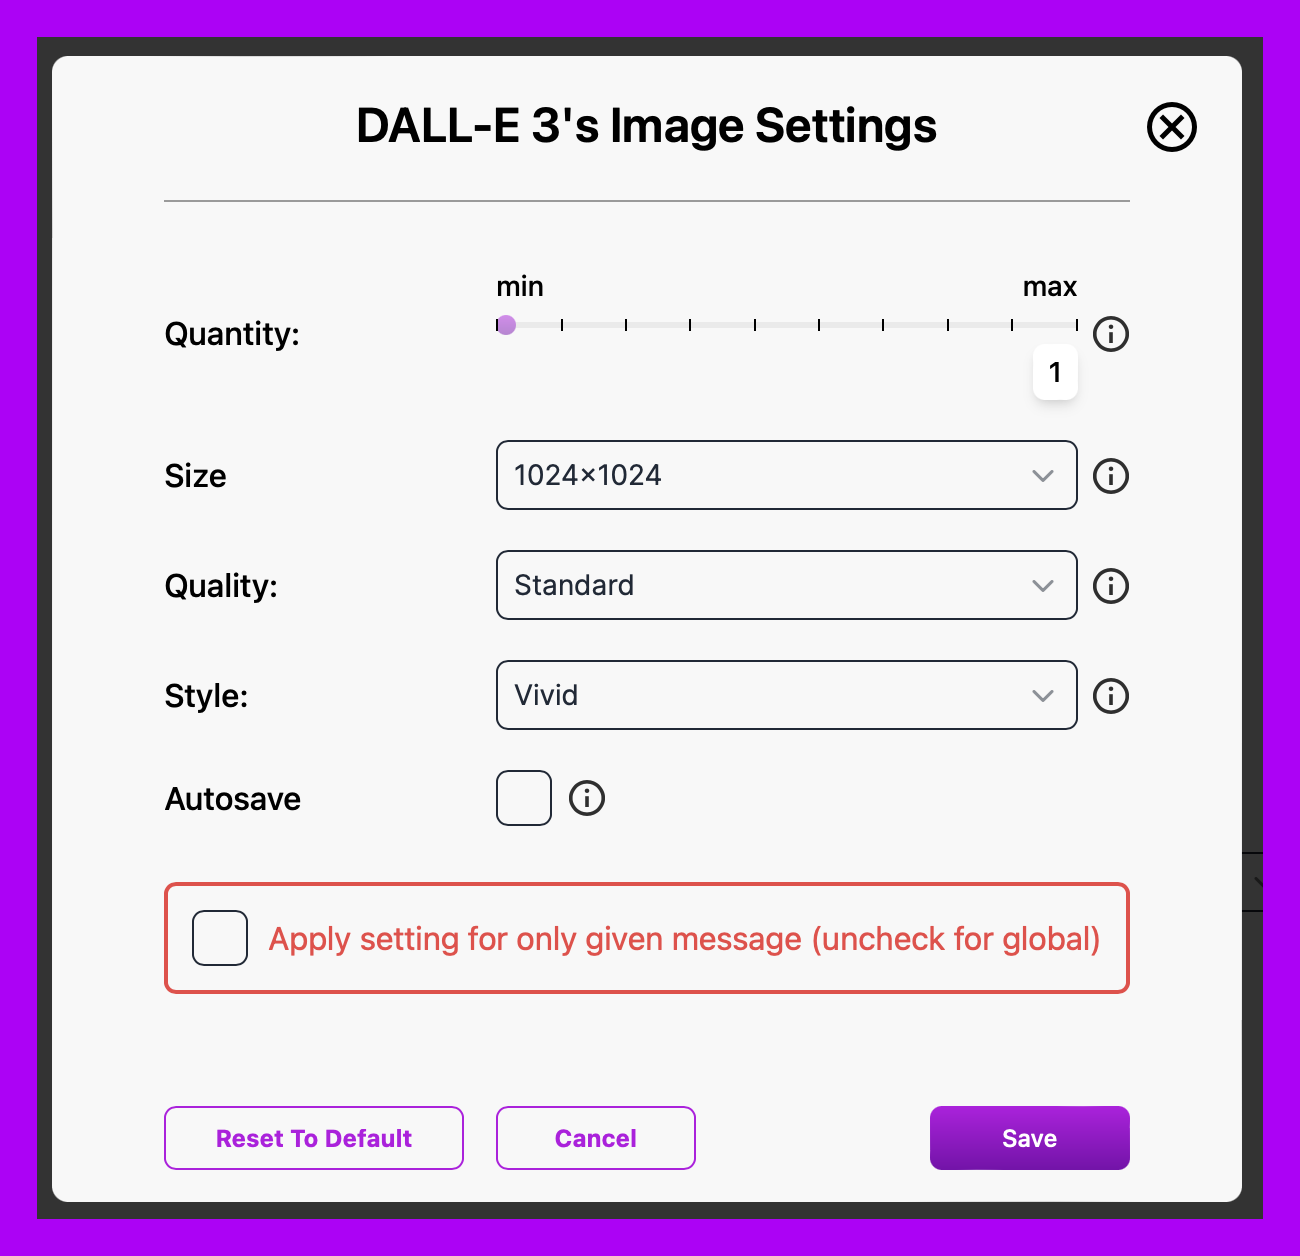
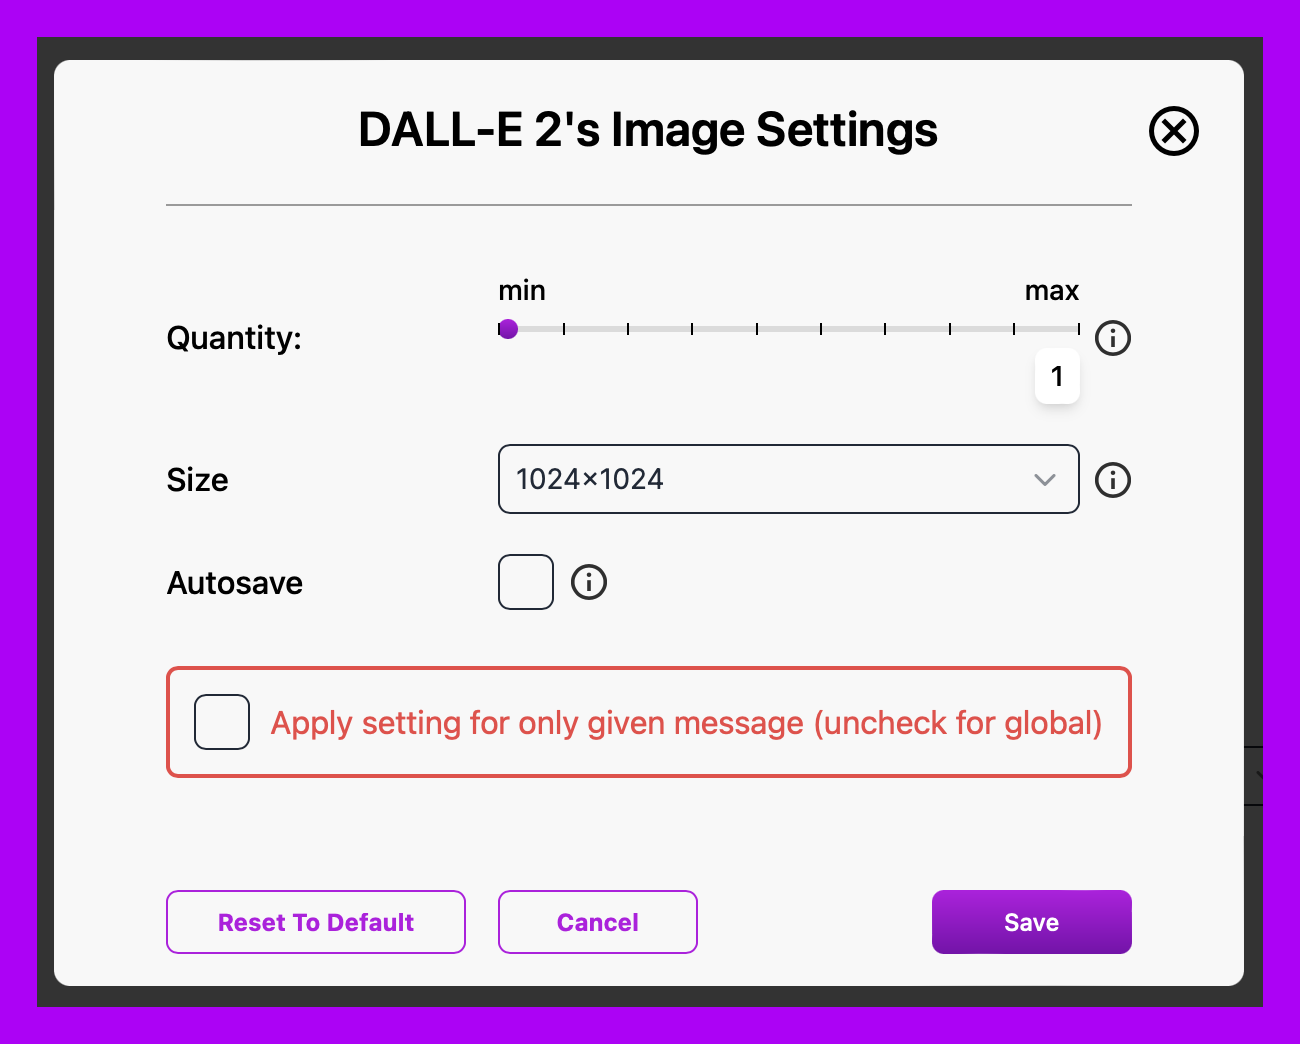
17. Image Settings
You can customize image settings by selecting the parameters. You can get more details on info icon hover. Make checkbox checked if you want to apply settings for current message.
DALL-E 2 Image Settings
DALL-E 2 Image Settings
18. Image Upload and Get Response
You can upload image and get response for that image information

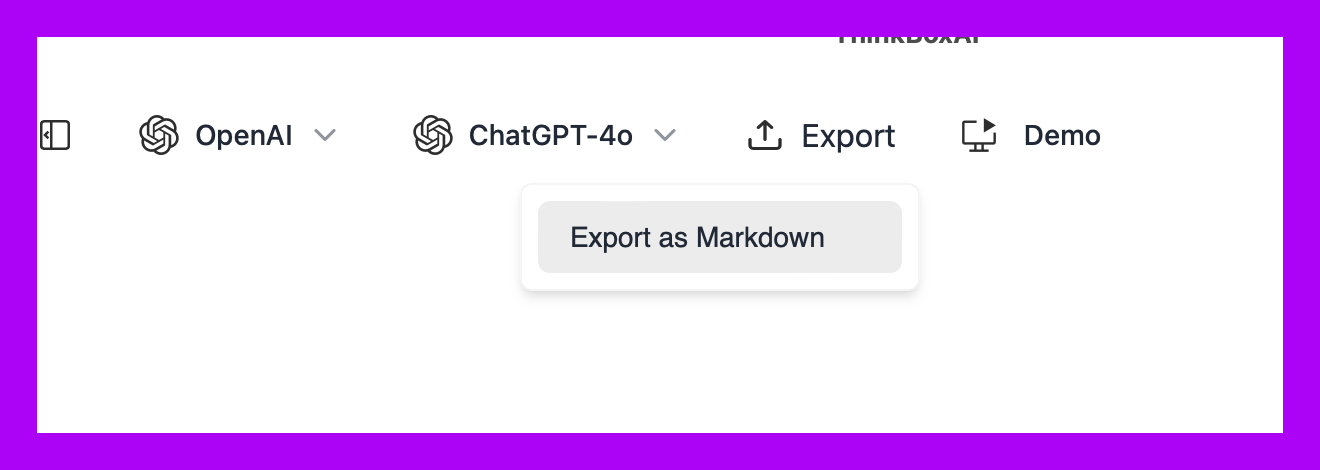
19. Exporting Chat as Markdown File
You can export chat as markdown file by clicking on Export >> Export as Markdown button.